Google Play Console Help: A Practical 2026 Guide
Get reliable Google Play Console help for setup, uploads, testing, and reviewer responses. Practical steps and fixes for common app publishing issues in 2026.

You've uploaded the app, completed the store listing, and still can't reach production. One screen asks for a closed test, another flags a declaration, and a reviewer message points to a policy page without explaining what needs to change. The problem usually isn't a missing menu item. It's that Google Play Console works like a dependency chain, where an early account or release decision can restrict the next step.
That's why useful Google Play Console help has to explain sequence, not just navigation. Account type affects verification and transfer options. The first upload affects testing. Testing affects production access for certain personal accounts. Listing metadata, declarations, and reviewer communication then determine whether the release moves forward cleanly.
Table of Contents
- The Stuck Point Most Google Play Console Help Guides Skip
- Setting Up Your Developer Account the Right Way
- Preparing Your First App Upload From Build to Listing
- Getting Past the Closed Testing Gate as a New Publisher
- Reading and Answering Google Play Reviewer Messages
- A Pre-Submission Checklist and When to Get Outside Help
<a id="the-stuck-point-most-google-play-console-help-guides-skip"></a>
The Stuck Point Most Google Play Console Help Guides Skip
A new publisher can have a finished build and still find production unavailable. The dashboard shows disabled options, the sidebar offers little context, and a menu-by-menu tutorial points to steps that assume verification, an existing release, or a configured testing track. The missing piece is usually the order of operations.
Google Play Console help works better as a dependency map than as a list of clicks. A track controls how a build is distributed and who can access it. The store listing must match the app's behavior, including its claims, screenshots, content declarations, and privacy disclosures. A mismatch discovered during review can send you back to an earlier stage.
Practical rule: Treat each Console screen as part of the release pipeline. Before changing a setting, identify the later review or distribution step that relies on it.
Use this sequence:
- Confirm the account structure and verification status.
- Prepare a signed Android App Bundle and an accurate store listing.
- Use internal testing to check the build and listing mechanics.
- Run the required closed test if the account is subject to it.
- Handle reviewer messages by category, evidence, and specific remediation.
- Submit only when the account, declarations, assets, and testing record agree.
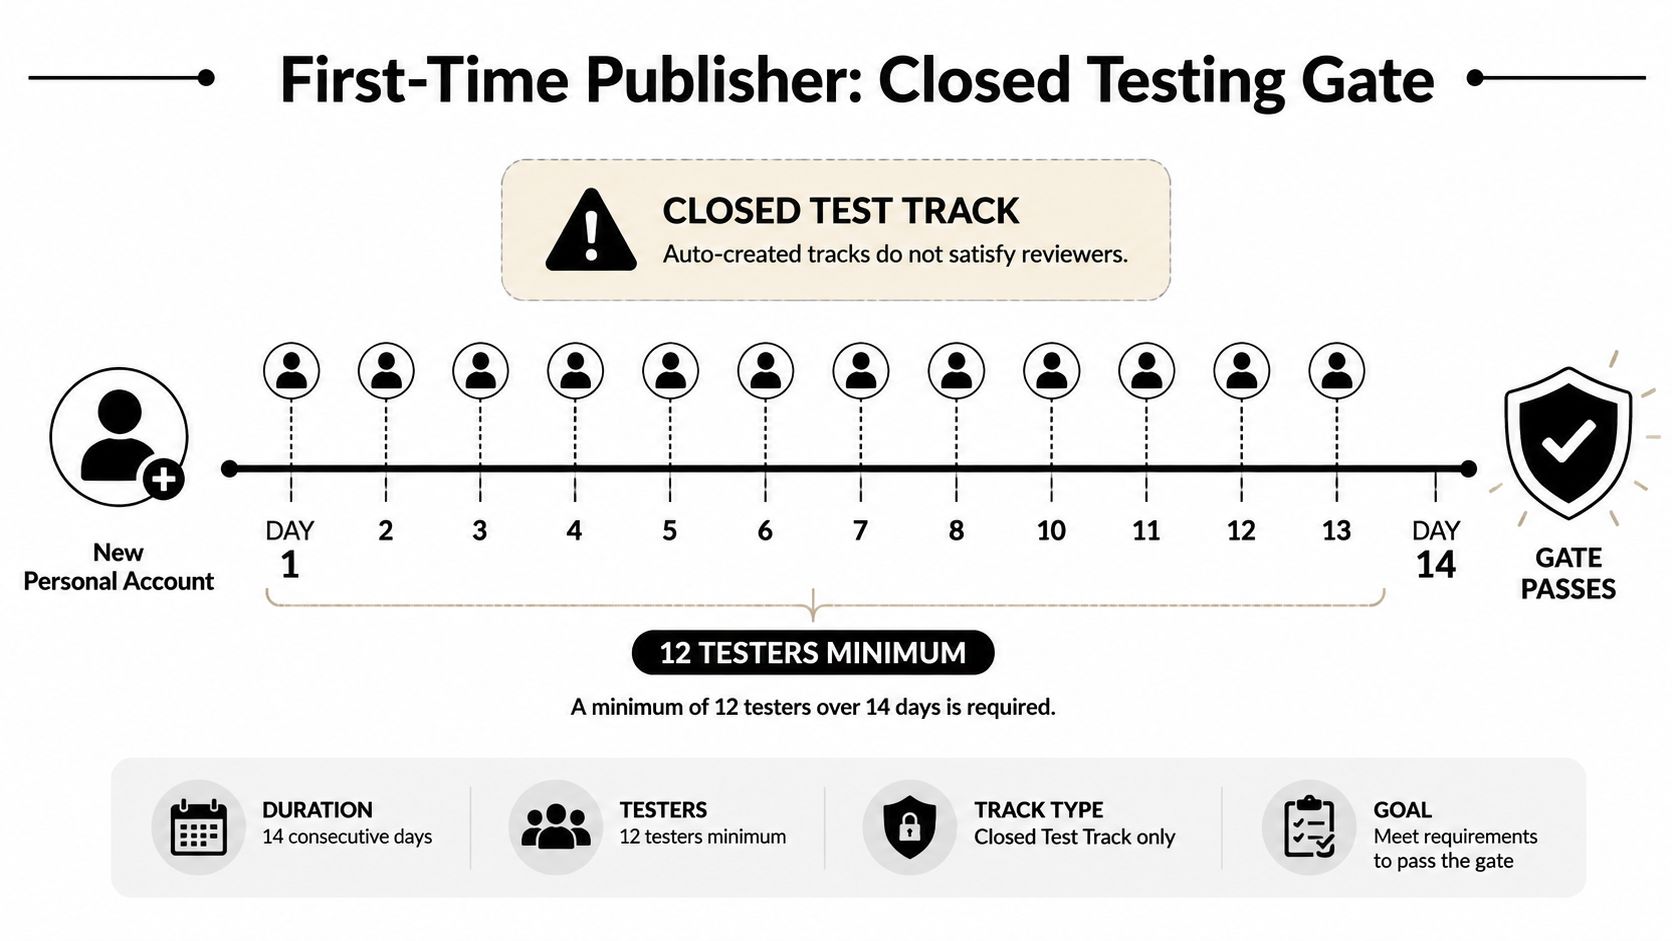
The sequence has particular consequences for newly created personal developer accounts. Google introduced a production-access gate in November 2023. It required a closed test with at least 20 testers for 14 consecutive days. Google later revised the threshold in December 2024 to at least 12 testers for the same 14 consecutive days, as described in Google Play's production access requirements for personal accounts. The lower tester count makes recruitment easier, while the continuity requirement remains.
Older personal accounts and organizational accounts do not fall under that specific new-account rule. Confirming the account category early prevents a finished app from waiting in production access because the wrong testing path was chosen. A technically complete release can still be blocked by an account-level dependency, so plan the sequence before uploading the first candidate build.
<a id="setting-up-your-developer-account-the-right-way"></a>
Setting Up Your Developer Account the Right Way
Account setup determines who can publish, who can recover access, and how easily ownership can change. Choose the account type before inviting collaborators or building a release process around it.
A personal account may suit an individual developer publishing under their own identity. An organization account is more appropriate when the app belongs to a company, studio, client, or team that needs continuity beyond one person's employment. Google's account-transfer guidance makes clear that ownership changes should use the official transfer workflow, so account structure isn't a detail to postpone. Developers can review the current requirements and deadlines in Google Play's policy deadlines table.
<a id="decide-who-owns-the-release"></a>
Decide who owns the release
Use an email address controlled by the business or studio, ideally a group-managed mailbox rather than a personal inbox. Turn on two-step verification before the first upload, then document who has recovery access. A locked administrator account can stop publishing even when the build, listing, and review response are ready.
For an organization, gather the required business identity information before signup. Google may request business documentation and verification details, and the precise requirements can change as policies are updated. Don't enter a casual brand name in the developer profile if the legal entity will later need to prove ownership of the app.
The account profile should remain accurate after registration. Country, developer name, contact details, and identity information can affect verification, support conversations, and transfers. Treat those fields as operational records, not decoration.
| Factor | Personal Account | Organization Account |
|---|---|---|
| Ownership | Usually tied to an individual developer | Tied to a business or organization |
| Best fit | Independent publishers and personal projects | Studios, companies, agencies, and client-owned apps |
| Continuity | Depends heavily on one person's access | Better suited to team-managed publishing |
| Transfer planning | May require a formal ownership transfer later | Still requires the official transfer process when ownership changes |
| Verification | Individual identity and payment details may be required | Business identity and supporting documentation may be required |
<a id="verify-before-you-build-release-habits"></a>
Verify before you build release habits
Complete every verification request shown in Play Console before treating the account as production-ready. If the console asks for identity, payment, address, or business information, resolve it while the project is still flexible. A release submitted against an incomplete developer profile creates an avoidable bottleneck.
The account fee is only the entry point. The larger cost comes from building the wrong ownership model and discovering it when a client, employer, or co-founder needs control of the app. Decide the owner first, assign access deliberately, and keep the recovery path outside one person's device.
<a id="preparing-your-first-app-upload-from-build-to-listing"></a>
Preparing Your First App Upload From Build to Listing
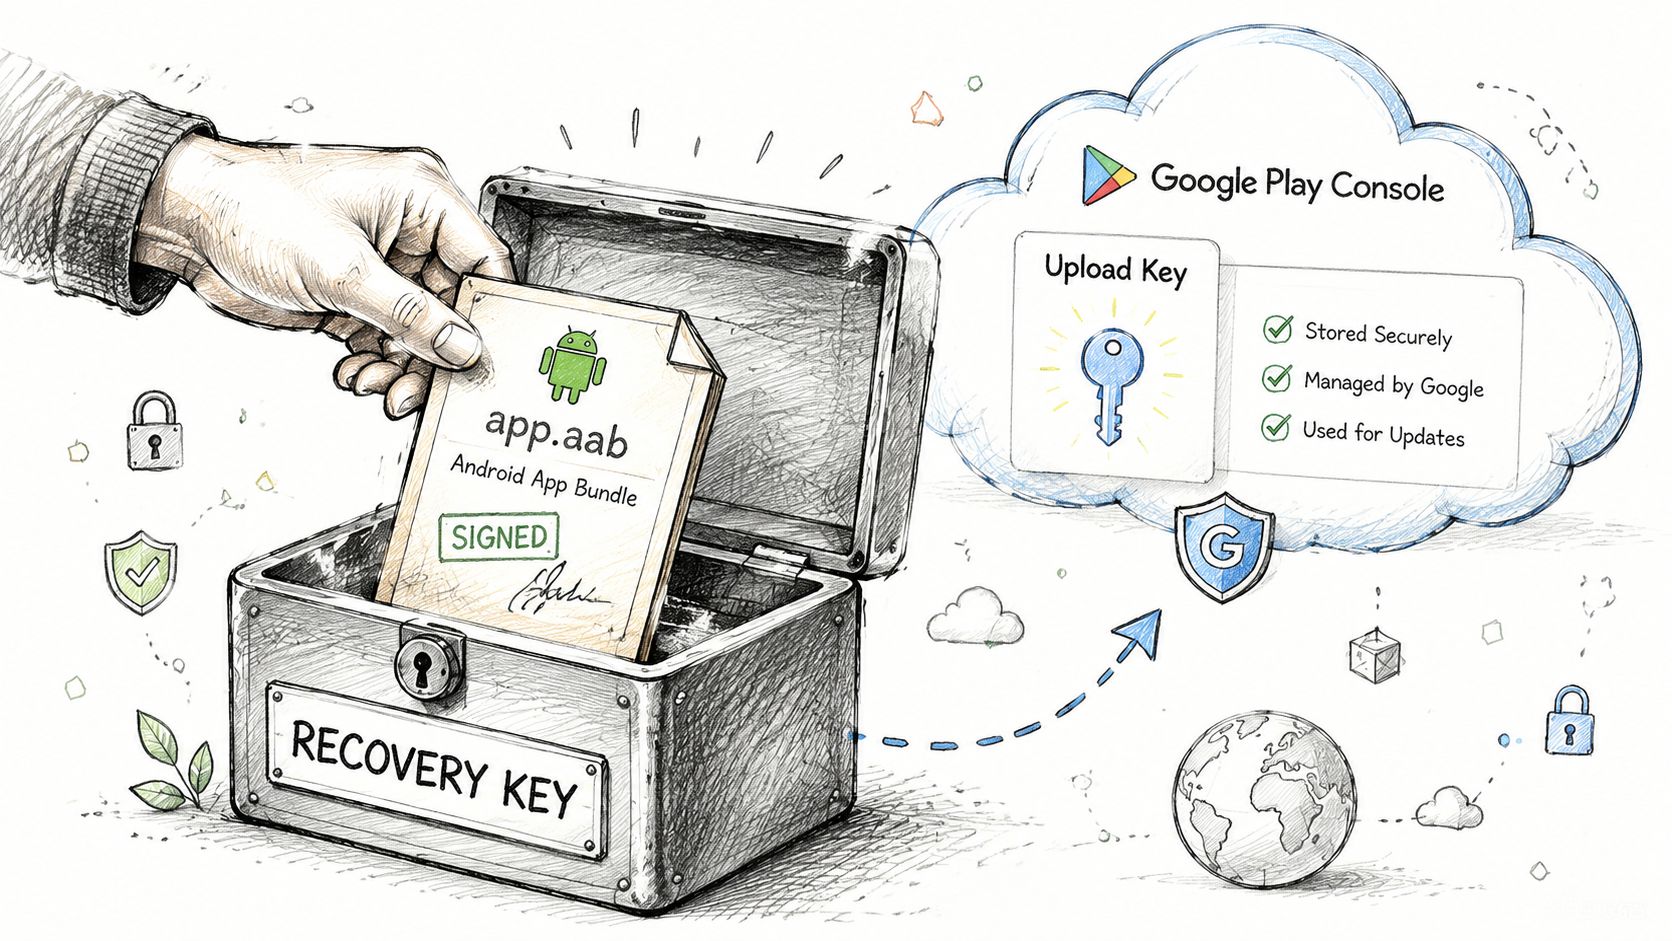
A dependable first upload starts in the build system, not in the release screen. Generate a signed Android App Bundle, keep recovery material secure, and use Play App Signing so Google can manage the app-signing side of distribution while your team protects the upload and recovery credentials.
Google's publishing guidance says that new apps have used the Android App Bundle format since August 2021, and that expansion files, or OBBs, aren't supported for new apps. The same Play Console release documentation notes that new apps and updates must target Android 10, API level 29, or higher, with Wear OS apps as the stated exception targeting API level 28. These requirements are part of Google's broader standardization of app delivery and platform compatibility.
<a id="validate-the-artifact-before-console-sees-it"></a>
Validate the artifact before Console sees it
Build the same release variant you intend to distribute. Check application ID, version information, signing configuration, manifest permissions, and environment values. A common failure is uploading a staging flavor with test endpoints, placeholder content, or a different package configuration from the one used during review.
Use Bundletool or the Android Studio bundle inspection tools to examine generated splits and confirm that required resources are available. Android App Bundles let Google deliver device-specific APK components, but your feature modules and build configuration still need to agree. Test installation through Google Play distribution, not only by sideloading a locally generated APK.
Start in internal testing. It gives you a controlled place to verify installation, sign-in, billing, deep links, analytics consent, and listing behavior before you commit the release to a broader test audience. Internal testing isn't a substitute for a required closed test, but it's an efficient engineering checkpoint.
<a id="make-the-listing-match-the-product"></a>
Make the listing match the product
Complete the store listing from the product outward:
- Descriptions: Remove claims the app can't demonstrate in the reviewed build.
- Screenshots: Use genuine screens that match the current interface and supported device layouts.
- Feature graphic: Prepare the required asset at the format specified by Play Console rather than stretching a phone screenshot.
- Privacy policy: Host a readable policy at a stable public address that identifies the publisher and explains relevant processing.
- Data Safety: Reconcile every answer with your app code, backend behavior, analytics SDKs, crash reporting tools, advertising libraries, and login flow.
The Data Safety form deserves a separate review by someone who understands the app's data paths. Don't answer from memory or from what the product team intended. Compare the declarations with the SDKs and network requests present in the release candidate, then make sure the privacy policy uses consistent language.
<a id="getting-past-the-closed-testing-gate-as-a-new-publisher"></a>
Getting Past the Closed Testing Gate as a New Publisher
A newly created personal account can reach a predictable bottleneck: the app is ready, yet production access remains unavailable because the required closed test was treated as an administrative task. For accounts subject to Google's production-access rule, the test requires at least 12 testers for 14 consecutive days. Testers must have access to the relevant closed track, and their participation should reflect actual app use rather than a dormant list of email addresses. Review the current requirement in Google Play's personal account testing guidance.
The workflow matters because a bad track setup can create a delay that appears much later as a production-access problem. Keep a simple record of tester access, exercised flows, reported defects, and fixes released during the test. The record does not need to manufacture activity. It should show a credible link between access, usage, feedback, and changes.
<a id="configure-the-track-carefully"></a>
Configure the track carefully
Create the closed track with the intended release variant, add tester email addresses or a tester group, and verify enrollment from a tester's device. Have testers install through Google Play, sign in when required, and complete the core journey. Open the opt-in URL yourself before distributing it.
Common failures include:
- Wrong build flavor: Testers receive a staging build or a release without required services.
- Broken opt-in path: The invitation arrives, but enrollment does not grant access.
- Inactive testers: Addresses appear in the list, but users neither install nor exercise the app.
- Untracked fixes: The developer cannot explain what testers did or what changed afterward.
- Premature promotion: Production access is requested before the required period and Console status are complete.
Keep the release stable during the required period unless a fix is necessary. If a new build is uploaded, record the reason and verify that the active test still satisfies the requirement shown in Play Console. An internal release, a newly created track, or a list of invited users does not by itself demonstrate meaningful testing.
The handoff occurs when Play Console shows the requirement as met and the review materials are final. Treat production as a separate submission: test the exact artifact, recheck its declarations, and prepare reviewer notes covering credentials, restricted areas, subscriptions, and behavior that may not be obvious.
The visual guide below pairs the workflow with the relevant Console screens.
<iframe width="100%" style="aspect-ratio: 16 / 9;" src="https://www.youtube.com/embed/sU5vAhbzbw8" frameborder="0" allow="autoplay; encrypted-media" allowfullscreen></iframe><a id="reading-and-answering-google-play-reviewer-messages"></a>
Reading and Answering Google Play Reviewer Messages
A reviewer message is most useful when you classify it before responding. The three recurring categories are policy violations, metadata problems, and functional issues. Each requires different evidence, and a long response in the wrong category usually creates more noise rather than more progress.
A policy message normally includes a policy reference or a linked policy area. Read the cited requirement against the exact app behavior, not just the title. Identify the trigger, the affected screen or permission, and the smallest compliant change. If the policy concerns a permission, explain why the app needs it and remove the permission if the core experience doesn't require it.
A metadata rejection points to the public-facing representation of the app. Review the short and full descriptions, screenshots, title, icon, content rating answers, and promotional claims. The fix may be editorial, but don't assume that changing copy solves a mismatch if the app itself still displays the prohibited behavior.
A functional issue means the reviewer couldn't complete a core flow. Reproduce it on a clean device, test the reviewer's exact path, inspect crash and server logs, and check credentials, regional availability, network dependencies, and feature flags. If login is required, provide working review credentials and explain any setup steps without making the reviewer guess.
| Message Type | What Reviewer Wants | Best Response |
|---|---|---|
| Policy violation | A compliant app behavior and a clear explanation | Change the trigger, remove unnecessary access, or provide evidence that the cited condition doesn't apply |
| Metadata rejection | Accurate, policy-compliant public information | Update the affected text or asset, then verify that the listing matches the current build |
| Functional issue | A reliable path through the app | Reproduce the failure, fix the flow, and provide reviewer credentials or navigation steps where needed |
<a id="choose-between-appeal-and-resubmission"></a>
Choose between appeal and resubmission
Appeal when you have specific evidence that the reviewer misunderstood the app or when the cited policy doesn't apply. Include the policy reference, the exact screen or flow, test credentials if relevant, and concise evidence such as logs, permission explanations, or a description of the changed behavior.
Resubmit cleanly when the issue is real. Don't argue that similar apps do the same thing, blame the reviewer, or paste a general statement about compliance. Those replies don't help the next reviewer verify a change.
Response timing varies by issue. Policy replies often arrive within 72 hours, while metadata responses may arrive within 24 hours, according to the workflow expectations described in the brief. Functional issues depend on severity and reproducibility. If the expected window has passed, use the developer support channel with the existing case context rather than opening disconnected requests.
<a id="a-pre-submission-checklist-and-when-to-get-outside-help"></a>
A Pre-Submission Checklist and When to Get Outside Help
The final review should follow the same dependency order as the release. Open each relevant Play Console screen and verify the state directly, rather than relying on a project checklist that can drift away from the dashboard.
<a id="check-the-release-in-sequence"></a>
Check the release in sequence
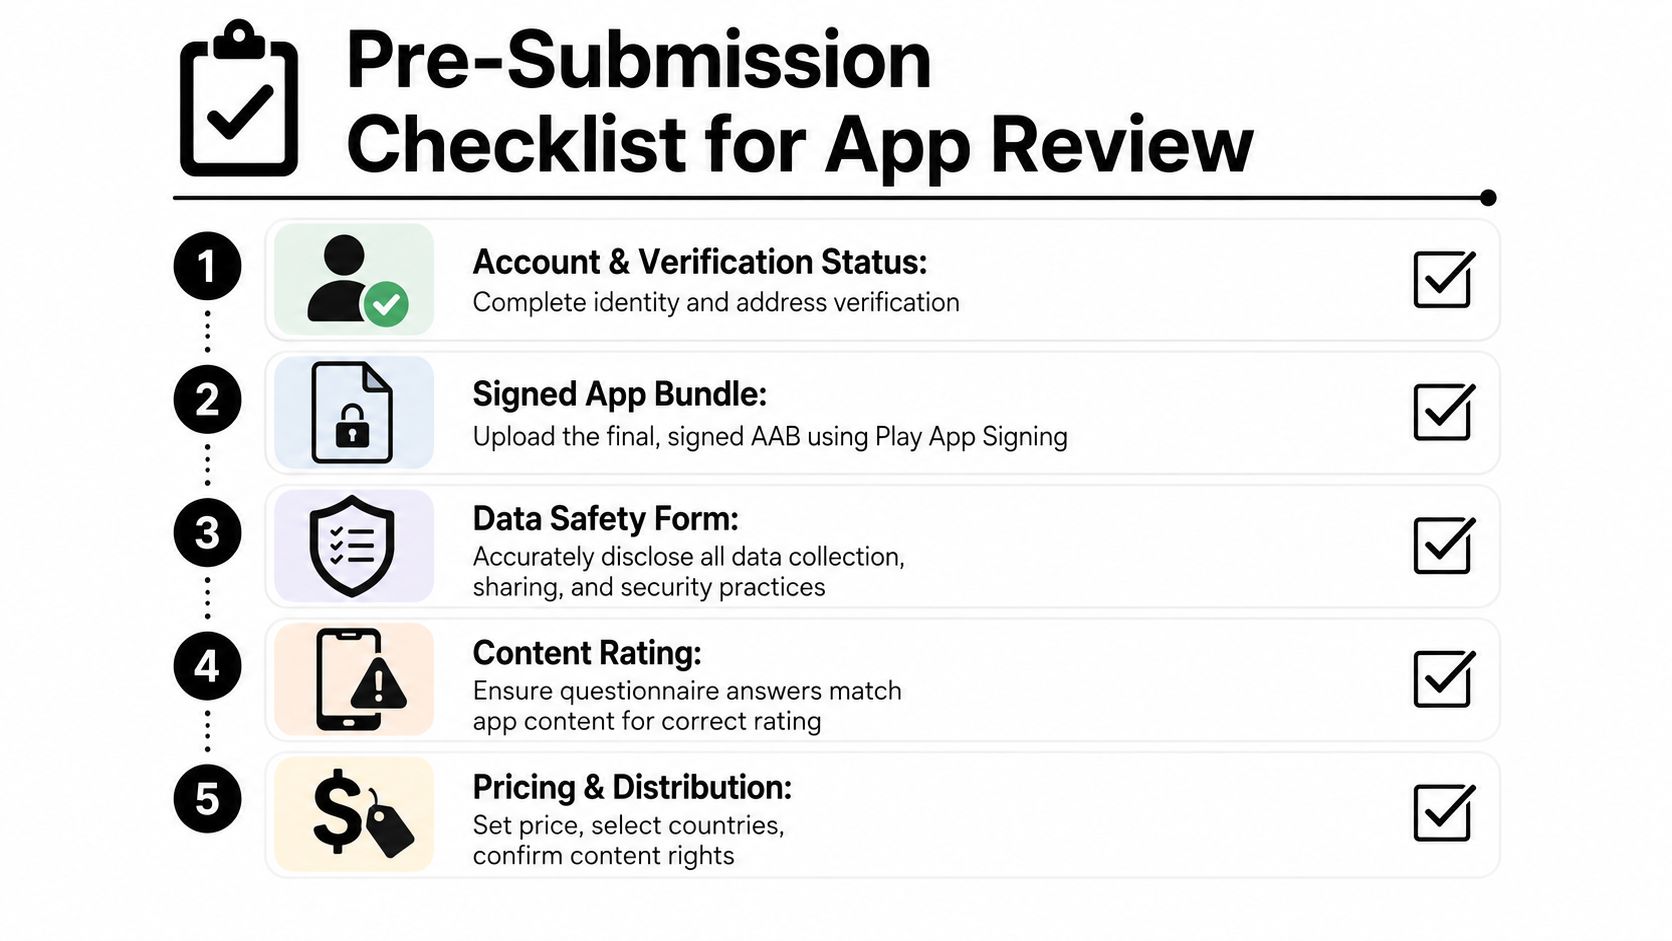
- Account and verification: In the developer account and verification areas, confirm that identity, contact, payment, and organization information is complete. The frequent miss is an unresolved verification prompt hidden behind an otherwise usable dashboard.
- Signed App Bundle: In the release track, confirm that the final AAB uses the intended package, version, signing setup, and production configuration. Teams often test one flavor and upload another.
- Data Safety: In the App content area, reconcile disclosures with actual collection, sharing, SDK behavior, and security practices. Don't copy answers from a previous app without reviewing the current dependency set.
- Content rating: Complete the questionnaire with the content and functionality in mind. A mismatch between answers, store copy, and in-app behavior can trigger a metadata review.
- Store listing and distribution: Inspect screenshots, descriptions, privacy policy, pricing, countries, and rights for every selected market.
- Testing evidence: For an affected personal account, confirm the closed-test status, tester access, continuity, engagement notes, and production-access request.
Solo publishing makes sense for a straightforward app when you understand its data flows, can manage signing safely, and have time to answer reviewer questions. Outside help becomes more practical when the app uses sensitive permissions, targets children or families, depends on complicated access rules, or represents a studio making its first submission.
A launch service can prepare listing assets, privacy documentation, compliance materials, signing workflows, reviewer notes, and Play Console submissions. LetsDeployIt is one option that handles Google Play and App Store submission work for React Native and Expo apps, including the closed-testing workflow for new Play Console accounts. Compare its scope, resubmission policy, account ownership terms, and exclusions with other providers before committing.
The decision is financial and operational, not emotional. Hand off the release when the cost of a one-week delay is greater than the service quote, or when an avoidable rejection would consume more engineering time than the launch work itself.
If you want someone to manage the Play Console sequence, LetsDeployIt prepares the listing, compliance materials, signing setup, reviewer notes, and submission workflow for React Native and Expo apps. Visit the service to discuss your app, testing requirements, and whether an end-to-end launch is a better fit than handling the release alone.