Build a React Native App Using Expo: Complete 2026 Guide
Learn how to build, configure, and deploy a React Native app using Expo. Covers managed vs bare workflows, EAS builds, signing, testing, and store approval.

You've built the app, tested the main flows, and watched it run smoothly in Expo Go. Then release day arrives. The binary is signed, the build upload succeeds, and the store still asks for privacy details, reviewer instructions, missing metadata, or clarification about a third-party SDK. A React Native app using Expo can move from idea to installable binary quickly, but approval depends on much more than a successful build.
The reliable approach treats Expo as a complete delivery pipeline, not a shortcut around mobile release engineering. You need sound project decisions, controlled native configuration, reproducible signing, real-device testing, accurate store disclosures, and a process for responding when a reviewer finds a mismatch.
Table of Contents
- Setting Up Your Expo Project for Success
- Choosing Between Managed and Bare Workflows
- Configuring Your App and Native Modules
- Building and Signing with EAS
- Navigating Store Submission and Approval
- Testing on Devices and Troubleshooting Common Issues
- Your Launch Readiness Checklist
<a id="setting-up-your-expo-project-for-success"></a>
Setting Up Your Expo Project for Success
A new Expo project should begin with decisions that are cheap to make early and expensive to change later. Pick the current SDK your dependencies support, decide whether you'll use Expo Router, and establish TypeScript, linting, environment handling, and repository conventions before feature work spreads across the codebase.
Create the project with the Expo tooling, then run it on both platforms as soon as possible:
npx create-expo-app@latest
cd your-app
npx expo start
Use Expo Go for early UI work, but don't mistake it for a production-equivalent environment. Once your app needs native configuration or a library that isn't included in Expo Go, create a development build and test that path instead. Early device checks expose permission prompts, keyboard behavior, status-bar differences, and native-module assumptions that simulators often hide.
<a id="choose-a-structure-that-supports-release-work"></a>
Choose a structure that supports release work
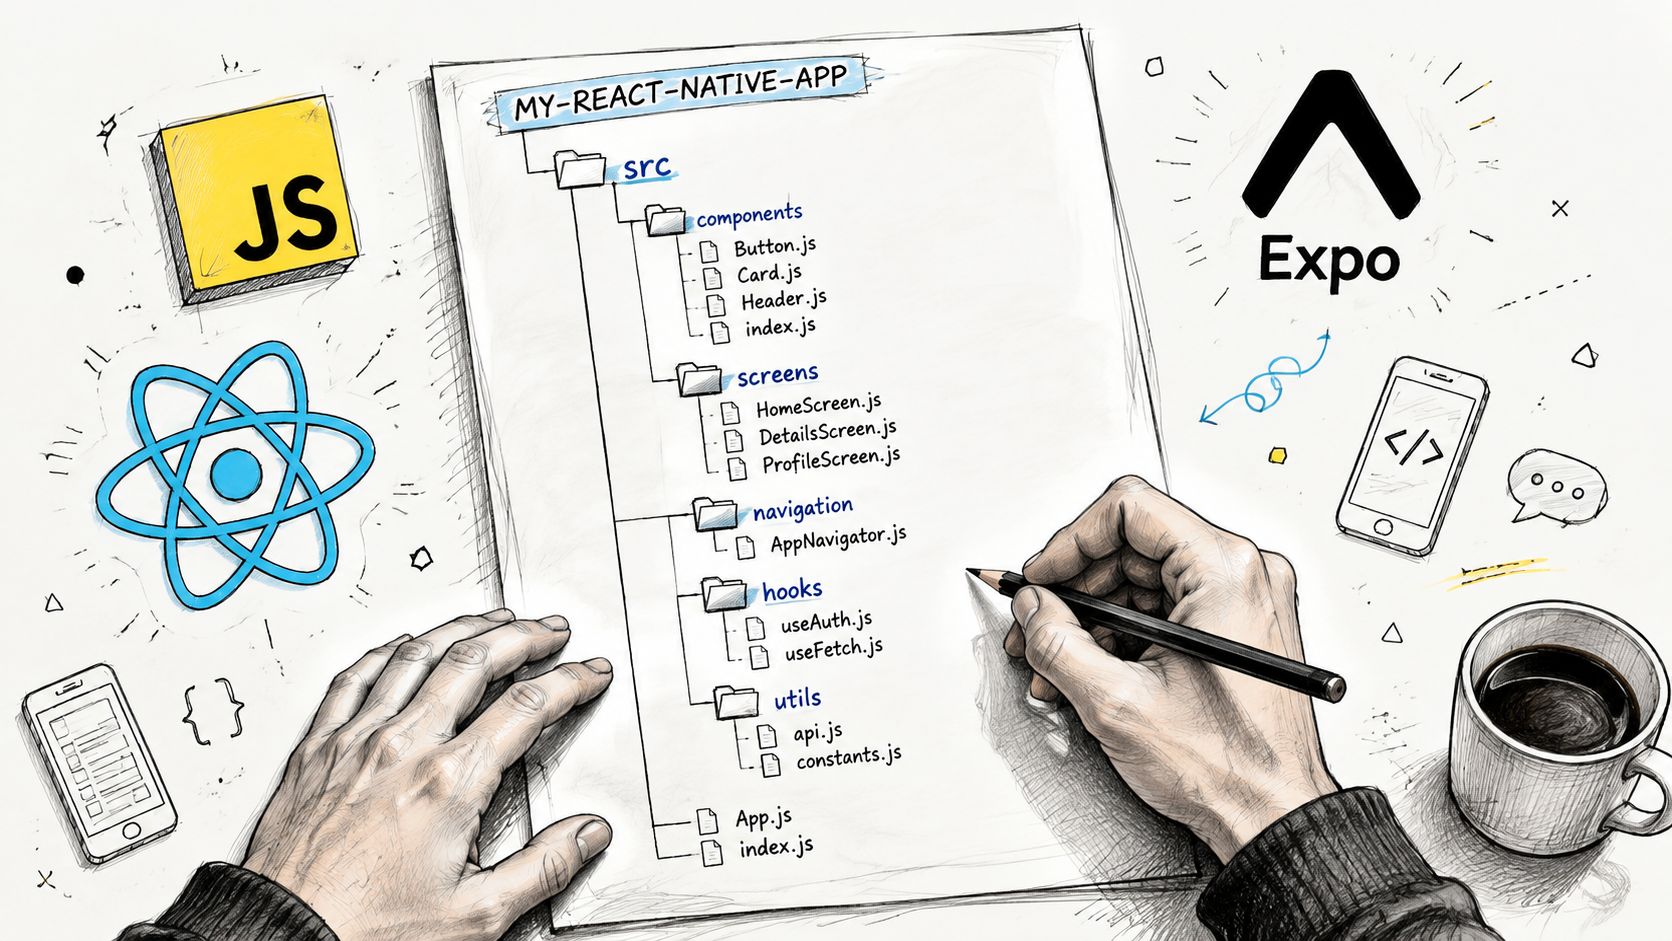
Expo Router uses files as routes, so keep route files focused on navigation and move reusable UI into directories such as components, screens, hooks, and utils. A src directory can separate application code from configuration and tooling, while platform-specific files such as .ios.tsx, .android.tsx, or .web.tsx keep substantial platform differences out of sprawling conditional logic.
A practical structure might look like this:
src/
  app/
  components/
  screens/
  hooks/
  services/
  utils/
assets/
app.config.ts
eas.json
The exact arrangement matters less than consistency. Keep server-only logic away from client code, avoid placing arbitrary helper files inside the route tree, and make each screen easy to test without reproducing the entire navigation state.
<a id="treat-sdk-upgrades-as-planned-maintenance"></a>
Treat SDK upgrades as planned maintenance
Expo's release cadence tracks newer React Native and React versions. SDK 53 shipped with React Native 0.79 and React 19, while SDK 56 later shipped with React Native 0.85 and React 19.2, as documented in this Expo SDK 53 release overview. The same source reports that more than 74.6% of SDK 52 projects on EAS had adopted the New Architecture by April 2025, which signals how quickly ecosystem defaults can change.
Don't upgrade in the middle of a store submission unless you have a reason and a rollback plan. Record the SDK, React Native, React, and native library versions in your release notes, run a clean development build after upgrades, and test authentication, notifications, payments, deep links, and background behavior before producing the production binary.
<a id="choosing-between-managed-and-bare-workflows"></a>
Choosing Between Managed and Bare Workflows
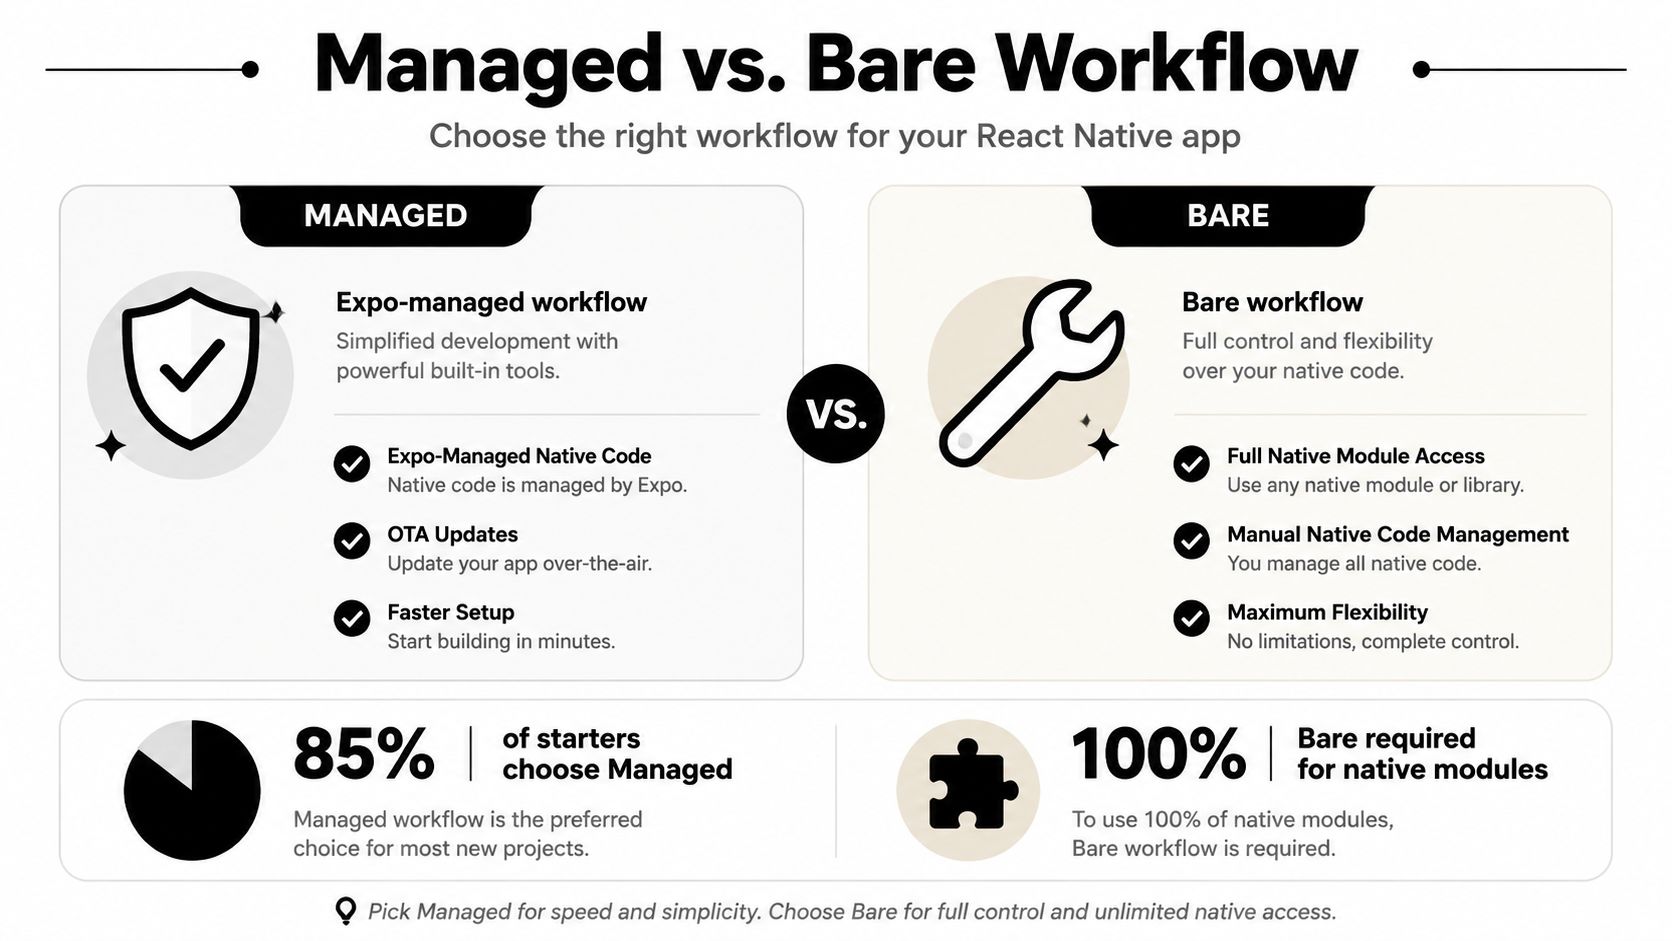
The difference between managed and bare workflows comes down to who owns the native projects, not which path produces a better app. In a managed project, Expo configuration and config plugins generate native projects when needed. In a bare project, the Android and iOS directories stay in your repository, and your team edits them directly. Continuous Native Generation makes the boundary less rigid. A managed project can still produce native projects and include custom native behavior through configuration.
<a id="managed-works-when-configuration-covers-the-product"></a>
Managed works when configuration covers the product
Managed development fits apps whose requirements match Expo modules and libraries with maintained config plugins. Keep native settings in app.config.js or app.config.ts, let prebuild generate the native directories, and avoid hand-editing files that SDK upgrades may replace.
This route reduces local setup and simplifies onboarding. It also connects cleanly to EAS Build, preview builds, and over-the-air JavaScript updates. The boundary still matters for release planning: any native change requires a new binary, and store approval still depends on permissions, signing, and reviewer-visible behavior.
<a id="bare-fits-products-that-require-native-ownership"></a>
Bare fits products that require native ownership
Choose bare when you need a native SDK without usable Expo integration, custom Kotlin, Swift, Objective-C, or Java changes, unusual Gradle or CocoaPods behavior, or direct control over application delegates and platform services. Bare does not remove Expo tooling. EAS Build, EAS Submit, Expo modules, and other ecosystem services remain available while your team owns the native projects.
That control creates ongoing work. Someone must handle signing settings, native dependency resolution, build scripts, platform permissions, and upgrade conflicts. A native module that works in a bare project may still need a config plugin before it behaves consistently in a generated project.
<a id="make-the-decision-from-constraints-not-preference"></a>
Make the decision from constraints, not preference
Check these points before committing:
- Native dependency fit: Does every required native library support your target SDK and workflow?
- Platform customization: Will you edit application lifecycle code, notification services, widgets, extensions, or custom build phases?
- Team capability: Can someone diagnose Gradle, Xcode, CocoaPods, and signing failures?
- Upgrade tolerance: Can configuration remain declarative, or must hand-maintained native files stay authoritative?
Performance should not decide the workflow by itself. A 2026 benchmark reported effectively identical New Architecture cold-start results for Expo and bare React Native, around 341 ms on Android and 267 ms on iOS, with negligible runtime differences, as reported in this Expo and bare React Native performance comparison.
<iframe width="100%" style="aspect-ratio: 16 / 9;" src="https://www.youtube.com/embed/8HjXuTvVfS4" frameborder="0" allow="autoplay; encrypted-media" allowfullscreen></iframe>Requirements can change after the first release. Add the missing native dependency, configure its plugin, run prebuild in a branch, compare the generated projects, and move to a development build before changing release credentials or store identifiers. That sequence limits surprises in signing and store records.
<a id="configuring-your-app-and-native-modules"></a>
Configuring Your App and Native Modules
Configuration is where a prototype becomes an identifiable store product. Set the application name, icon, splash behavior, bundle identifiers, package name, URL scheme, version, and runtime update policy deliberately. These values affect installation, deep links, updates, store records, and reviewer testing.
A typed configuration file keeps environment-specific decisions visible:
import type { ExpoConfig } from "expo/config";

const config: ExpoConfig = {
  name: "Example App",
  slug: "example-app",
  version: "1.0.0",
  scheme: "exampleapp",
  ios: {
    bundleIdentifier: "com.example.exampleapp",
    supportsTablet: true,
  },
  android: {
    package: "com.example.exampleapp",
  },
  plugins: [
    "expo-router",
    [
      "expo-camera",
      {
        cameraPermission: "Use the camera to scan products.",
      },
    ],
  ],
};

export default config;
Use a stable identifier from the first production-like build. Changing ios.bundleIdentifier or android.package later creates a different store application rather than a routine update.
<a id="add-native-behavior-through-config-plugins"></a>
Add native behavior through config plugins
A config plugin is the right managed-workflow mechanism for native changes. It can add permissions, modify plist values, update Android manifest entries, or configure a library during prebuild. Don't assume that installing a JavaScript package is enough. If a library needs native files or permissions, verify its installation instructions and inspect the generated project.
Permissions deserve product-level review. A camera prompt should explain the user-facing feature, location access should match the actual experience, and notification permission should be requested when the user understands the benefit. Unused permissions create trust and review problems, even when the build itself succeeds.
<a id="separate-public-configuration-from-secrets"></a>
Separate public configuration from secrets
Values exposed to the application bundle aren't secrets. Use EXPO_PUBLIC_ variables only for values that can safely reach client code, such as a public API base URL or feature flag. Keep private credentials on the server or in the build and deployment system, and make development, preview, and production environments explicit.
Native configuration changes usually require a new development or production build. JavaScript-only changes can use the update mechanism your release policy permits, but don't use an update to bypass a required native permission, entitlement, SDK, or privacy declaration. Test the exact build profile that will reach reviewers.
For navigation, prefer one routing strategy and keep route ownership clear. React Navigation works beneath Expo Router, while Reanimated needs the installation and Babel configuration expected by its version. Payment SDKs, health integrations, background tasks, and notification extensions deserve an early compatibility spike because they can determine whether generated native projects remain practical.
<a id="building-and-signing-with-eas"></a>
Building and Signing with EAS
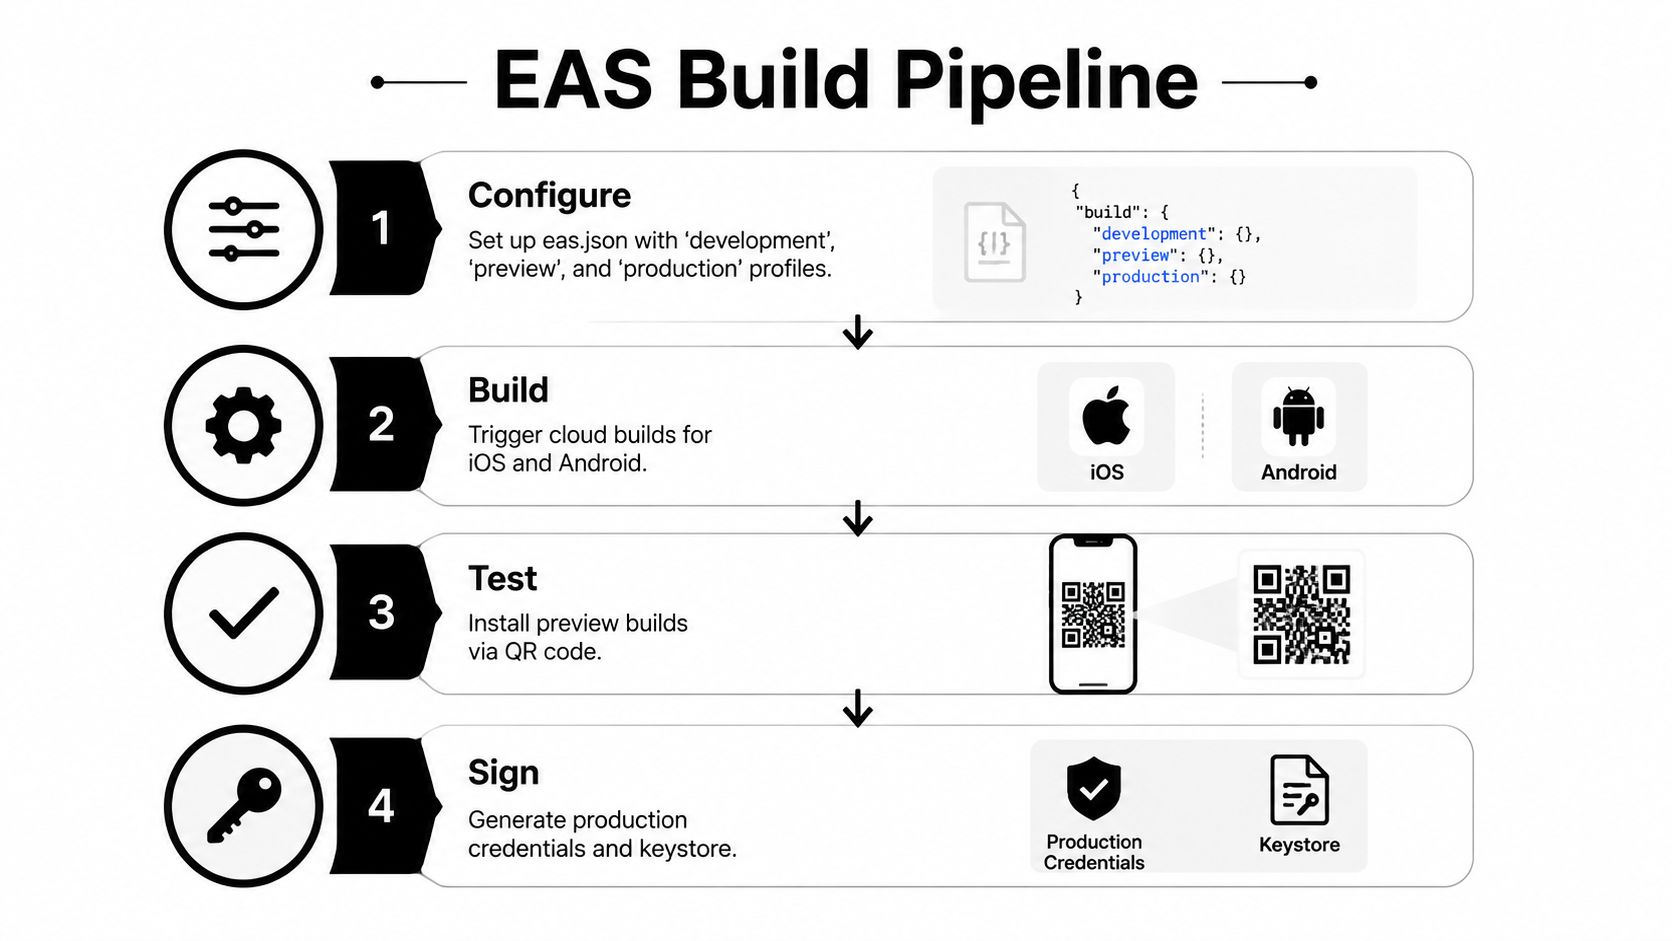
A green build does not mean an app is ready for approval. The profile must produce the right binary, use the right services, and preserve a signing setup the team can recover. Start with profiles that reflect how your team works:
{
  "build": {
    "development": {
      "developmentClient": true,
      "distribution": "internal"
    },
    "preview": {
      "distribution": "internal"
    },
    "production": {}
  }
}
A development profile supports native debugging, a preview profile gives testers a store-like binary, and production produces the artifact intended for submission. Keep environment values and update channels aligned with those profiles, so a preview build cannot point at production services by mistake.
<a id="let-eas-manage-credentials-but-retain-ownership"></a>
Let EAS manage credentials, but retain ownership
EAS Build can generate and manage Android keystores, iOS provisioning profiles, and distribution certificates. It supports remote or local credential resolution and can prebuild missing native directories in Continuous Native Generation workflows, as described in the EAS Build documentation.
Before the first production build, confirm the Apple team, bundle identifier, Google Play application, and signing account. Define credential access, document recovery procedures, and avoid unrelated credential sets for the same app. EAS handles much of the setup, while your team remains accountable for compliance and recovery.
Run builds with an explicit profile:
eas build --platform all --profile production
For a repeatable pipeline, commit eas.json, lock dependency versions, record the commit used for each submission, and keep production environment values outside source control. Build failures often come from mismatched native dependencies, missing credentials, invalid identifiers, or a configuration plugin that behaves differently after prebuild. Read the logs from the first failing phase instead of repeatedly rerunning the same command.
<a id="submit-the-artifact-then-verify-the-destination"></a>
Submit the artifact, then verify the destination
EAS Submit can upload builds to TestFlight and Google Play, but a successful upload does not confirm release readiness. Check the uploaded version, processing status, signing identity, release track, and tester access before requesting review.
The production binary must match the store listing and reviewer path. If the app shows a login wall, provide working credentials and explain the route to its main feature. If it requires location, purchases, or a hardware accessory, include exact test instructions in the reviewer notes. Store approval depends on these operational details as much as on a successful EAS build.
<a id="navigating-store-submission-and-approval"></a>
Navigating Store Submission and Approval
The most common launch mistake is treating submission as the final command in the terminal. Expo's documentation covers EAS Submit, store metadata, versioning, and build profiles, but the EAS Submit guidance also makes clear why the pipeline has more parts than uploading a binary. Store teams evaluate what the app does, what it claims, what data it collects, and whether reviewers can access the promised functionality.
<a id="prepare-the-review-packet-before-the-build"></a>
Prepare the review packet before the build
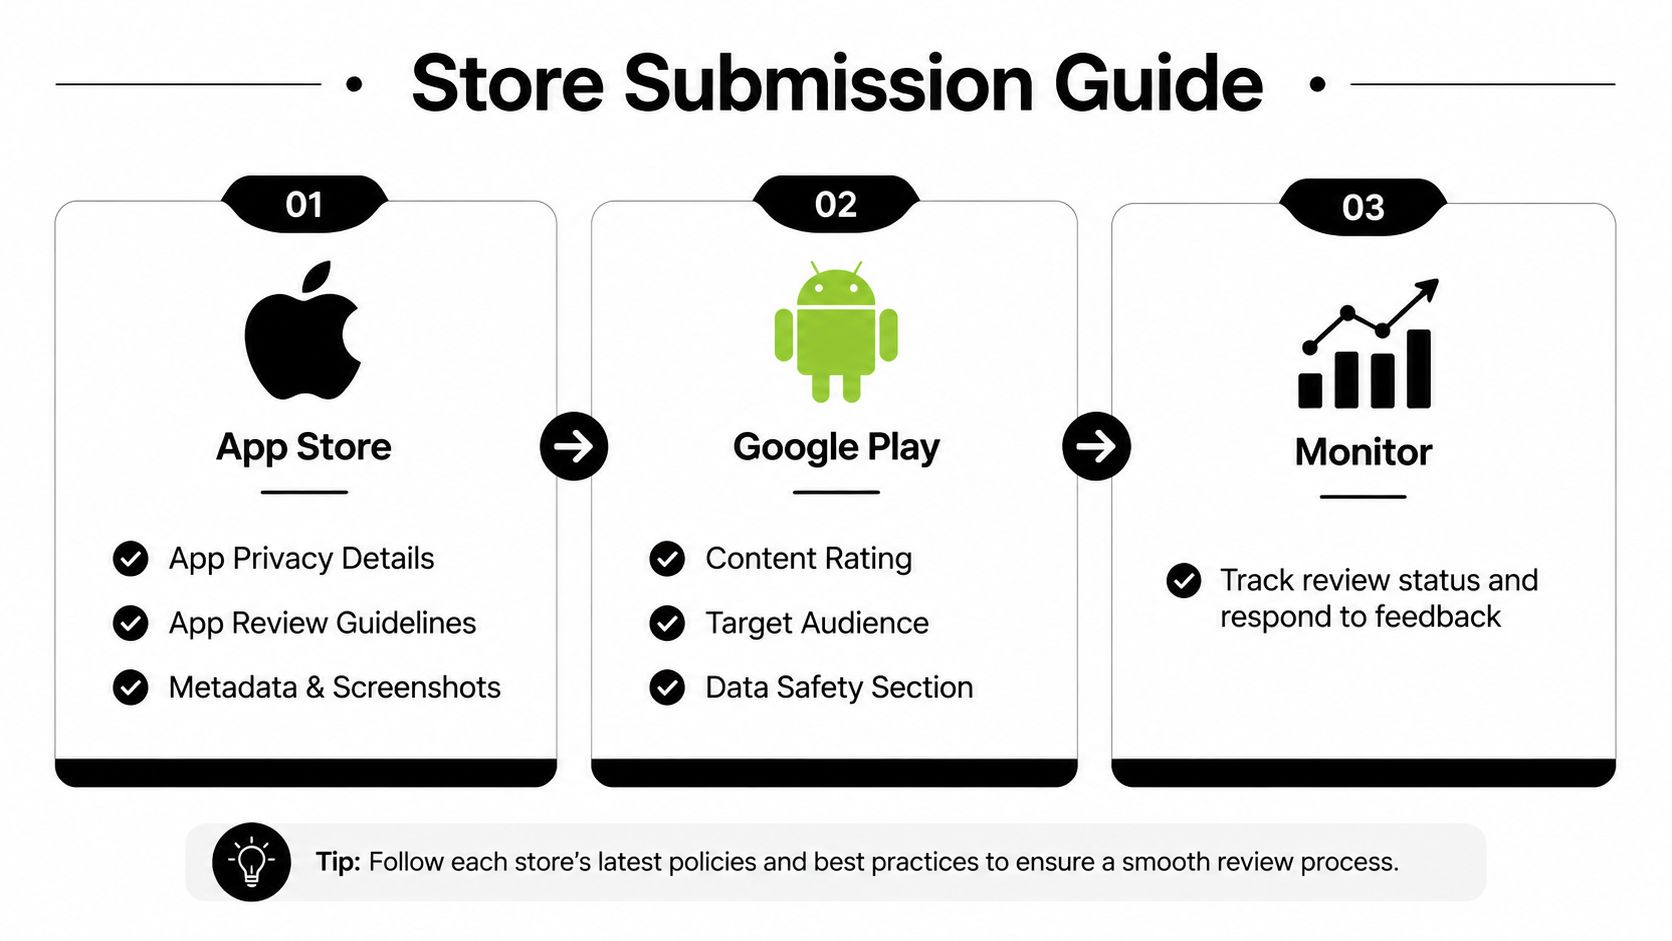
Create a submission folder containing the exact materials used for the release:
- Store metadata: Write the title, description, category, keywords, age or content information, and support details from the implemented product, not from the roadmap.
- Visual assets: Prepare the icon, screenshots, and any preview media required by the destination store and supported device classes.
- Privacy disclosures: Map analytics, authentication, payments, crash reporting, advertising, and third-party SDK behavior to the privacy and data-safety forms.
- Reviewer access: Supply demo accounts, one-time codes or bypass instructions where appropriate, test payment guidance, and a concise explanation of any permission prompt.
- Submission notes: Tell reviewers where the core feature is, what credentials provide, and how to reproduce anything that isn't obvious from the first screen.
The data-safety and privacy answers must describe the shipped binary. A dependency can collect data even when your own application code doesn't call its APIs directly, so review SDK documentation, platform manifests, and consent flows before answering forms.
<a id="compliance-failures-are-usually-product-failures"></a>
Compliance failures are usually product failures
Privacy manifests, permission text, reviewer notes, and metadata aren't paperwork added after engineering. They describe the user experience and must agree with it. If the listing promises a feature hidden behind an unavailable account, or the app requests a permission before explaining why, a technically valid build can still create review friction.
Apple or Google may also question platform-specific behavior, in-app purchases, user-generated content, subscriptions, account deletion, or third-party services. Keep a written response history, answer the reviewer's exact question, and submit a corrected binary when the issue is binary behavior rather than wording.
A launch service can help when the team has a finished Expo project but lacks store-operations capacity. LetsDeployIt prepares store copy, ASO keywords, screenshots, app icon polish, preview material, privacy and Terms hosting, compliance checks, reviewer notes, and the Google Play data-safety questionnaire, then connects the release to EAS Build and Submit. It's one option for teams that want submission handled alongside the technical release rather than treating approval as an afterthought.
<a id="testing-on-devices-and-troubleshooting-common-issues"></a>
Testing on Devices and Troubleshooting Common Issues
A simulator answers whether the app can render in a controlled environment. A real device answers whether users can grant permissions, receive notifications, open links, authenticate, rotate the screen, lose connectivity, and recover from an interrupted update.
Use Expo Go for screens that rely only on its included native capabilities. Switch to a development build as soon as your app depends on custom native configuration. Test a preview build before production so the binary, environment, signing, and release channel resemble what users and reviewers will receive.
<a id="diagnose-the-failure-at-the-correct-layer"></a>
Diagnose the failure at the correct layer
A white screen can come from a JavaScript exception, a route mismatch, a failed environment variable, or a native initialization error. Check Metro logs and device logs first, then reproduce from a clean install. If the failure appears only in a development build or production-like build, compare generated native configuration rather than changing UI code blindly.
For native crashes, inspect Android log output and Xcode device logs, isolate the library involved, and verify that its config plugin ran. For update problems, confirm that the update targets the installed runtime and that the JavaScript bundle doesn't require native capabilities absent from that binary.
<a id="monitor-real-sessions-after-launch"></a>
Monitor real sessions after launch
Lab tests won't reveal every startup condition. Expo's monitoring services documentation describes EAS Insights, which aggregates app usage across platforms, app store versions, and time, and EAS Observe, which records startup indicators such as cold launch time, time to first render, and time to interactive from real user sessions.
Use those signals to locate slow startup paths instead of relying only on a developer device. Pair them with crash reporting, structured logs, and a small device matrix covering the platforms and screen sizes your audience uses.
Practical rule: Reproduce a release issue with the same profile, runtime, account state, and permissions as the affected user before changing the build pipeline.
Test offline behavior, expired sessions, denied permissions, interrupted uploads, deep links from a cold start, and upgrade paths from the previous release. Those cases are more valuable before submission than another pass through the happy path.
<a id="your-launch-readiness-checklist"></a>
Your Launch Readiness Checklist
A production-ready Expo app has more than finished screens. Before submitting, verify that:
- Configuration is stable: Bundle identifiers, package names, version, icons, splash behavior, URL schemes, and permissions match the intended product.
- Native dependencies are validated: Development and preview builds install on physical iOS and Android devices.
- Signing is controlled: EAS credentials, Apple access, Google Play access, and team ownership are documented.
- Release behavior is tested: Authentication, payments, notifications, deep links, offline states, and update behavior work in the production-like build.
- Store materials are truthful: Screenshots, descriptions, privacy disclosures, data-safety answers, support details, and reviewer notes describe the submitted binary.
- Monitoring is ready: Crash reporting, usage visibility, startup measurements, and an owner for review responses exist before launch.
If a reviewer can't reach the main feature, pause the submission and fix access instructions. If privacy answers are guesses, pause again and audit the SDKs. The final release should be boring, reproducible, and easy for someone outside the engineering team to evaluate.
LetsDeployIt helps React Native and Expo teams prepare store listings, screenshots, privacy materials, reviewer notes, compliance forms, and end-to-end submissions through LetsDeployIt. If your binary is ready but approval work is slowing the launch, visit the service to review the available submission support.