React Native Deploy to Web: Ultimate 2026 Guide
Master react native deploy to web with this 2026 guide. Covers setup, code adaptation, hosting on Vercel/Netlify, and SEO for React Native & Expo apps.


Your mobile app is already doing the hard part. Users like the product, the UI works on phones, and now someone on your team has asked the obvious question, why can't this ship on the web too? That's the point where a React Native project either becomes a real multi-platform codebase or turns into a pile of browser-specific workarounds. React Native deploy to web sits right in that middle ground, and by 2026 it's no longer a side experiment, it's part of normal developer behavior.
The ecosystem data backs that up. In the State of React Native 2026 discussion, the reported share of developers using React Native for web was 24%, up from 22% the year before, so roughly one in four surveyed developers are now targeting the web (State of React Native 2026 discussion). That doesn't mean every mobile app belongs on the browser, but it does mean the decision is mainstream enough to plan for seriously. The primary question isn't whether React Native can reach the web, it's whether your app can feel like it belongs there.
Table of Contents
- Why Deploy Your React Native App to the Web
- Your First Step Preparing the Project
- Adapting Your Codebase for the Browser
- Handling Styles and Assets on the Web
- Building and Deploying to a Hosting Provider
- Post-Deployment Optimizations and Pitfalls
<a id="why-deploy-your-react-native-app-to-the-web"></a>
Why Deploy Your React Native App to the Web
A lot of teams reach this point after the mobile app is already stable. The founder wants a landing page that does more than promote the product. Marketing needs pages that search engines can index. Support wants a desktop-friendly interface for users who do not want to install anything. A browser build covers those needs without forcing a rewrite from scratch.
Web deployment changes distribution. Instead of depending only on iOS and Android stores, you can give someone a URL that opens on a laptop, a tablet, or a browser tab on a work machine. Expo's web docs describe web as a supported target in the same workflow, and React Native for Web is the compatibility layer that lets React Native components run in browsers (Expo web workflow docs). That matters because it turns a mobile-first codebase into a shared application layer that can serve more than one entry point.
<a id="search-desktop-and-lower-friction-acquisition"></a>
Search, desktop, and lower-friction acquisition
The browser gives you two advantages mobile apps do not get by default. Pages can be discovered through search, which helps with product-led growth and with public content surfaces you want indexed. Desktop access also removes a lot of adoption friction, especially for internal tools, onboarding flows, documentation hubs, and companion dashboards.
Practical rule: if the user's first action is reading, comparing, filling in a form, or checking a status page, the web often beats the app store.
React Native on the web still has trade-offs. If your product depends on dense interaction patterns, heavy animation, or browser-native behaviors that clash with your mobile UI model, a dedicated web app can be the cleaner choice. Expo's move into broader web hosting also reflects that shift from “can it run?” to “what should run here?” (Expo hosting announcement).
<a id="the-core-strategic-advantage"></a>
The Core Strategic Advantage
The biggest win is shared product velocity. A team can ship a feature once and expose it in multiple places, then decide later which screens need platform-specific polish. That is a better position than maintaining separate frontends for every small change.
If you already have mobile product-market fit, web deployment gives you another distribution channel without reopening the whole UI architecture. It also creates a cleaner path for testing content, onboarding, and conversion flows in a browser before you commit to deeper platform work.
<a id="your-first-step-preparing-the-project"></a>
Your First Step Preparing the Project
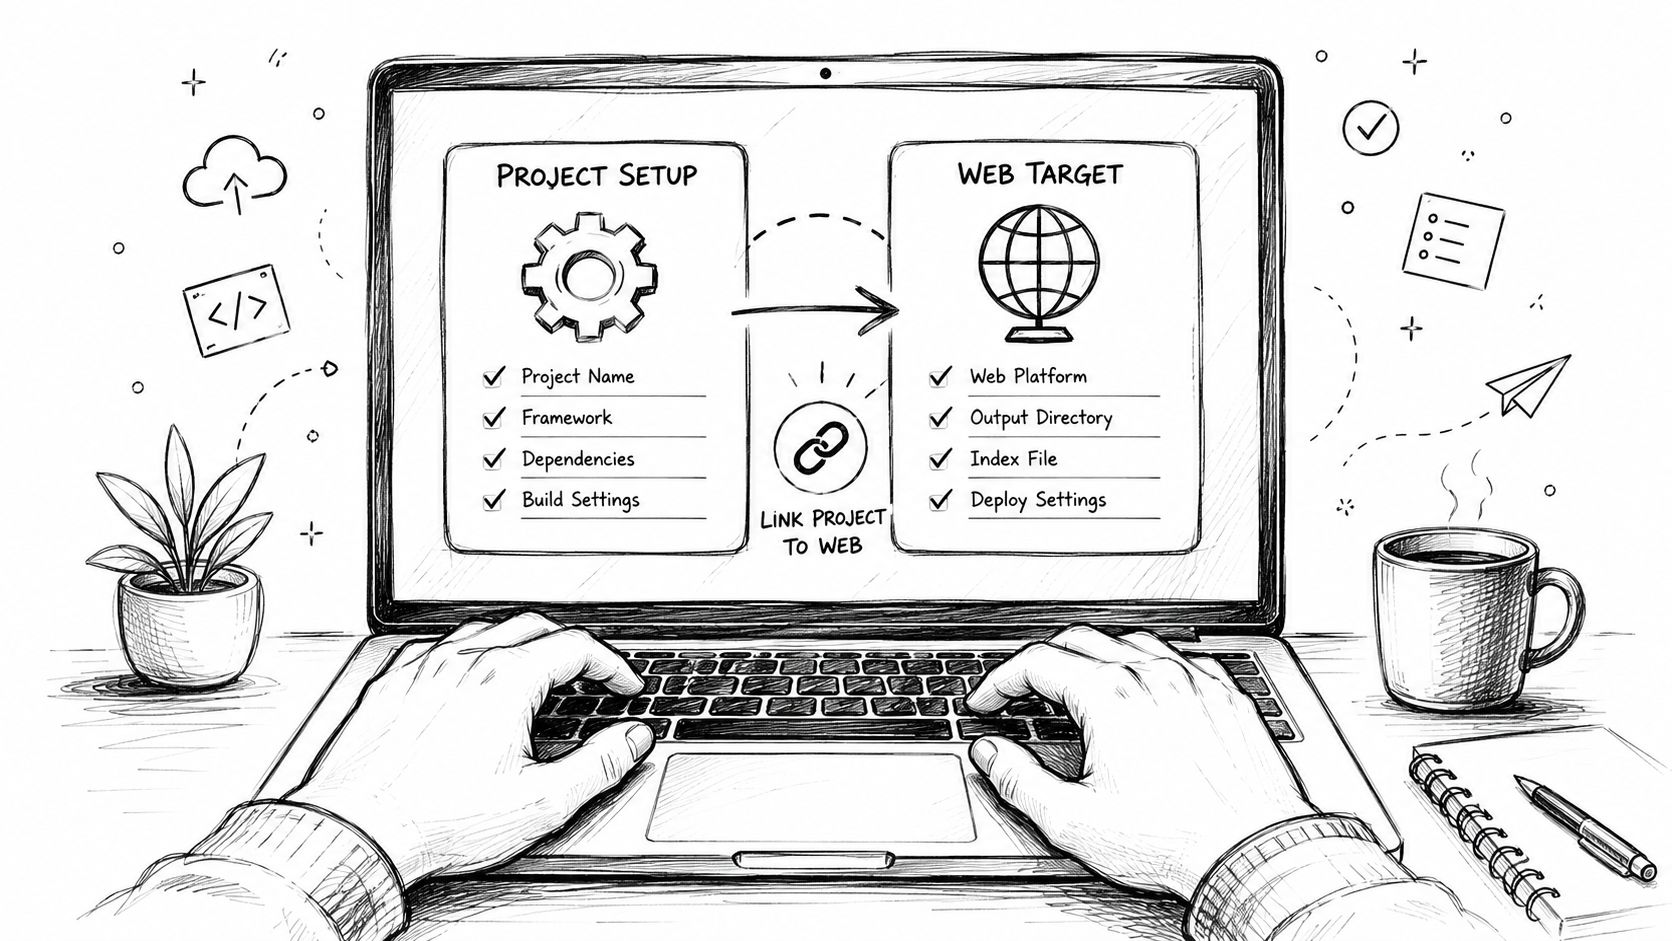
A common mistake is treating web deployment like a final packaging step instead of a project capability. If the codebase does not recognize a browser target, the build will fail before hosting ever enters the picture. The setup path also changes depending on whether you are working in Expo managed workflow or a bare React Native project, and that difference affects the tools you need from the start.
<a id="expo-managed-projects"></a>
Expo managed projects
Expo gives you the shortest route because the web target is already part of the platform model. You enable the browser runtime, start the project with web as the target, and verify that the same app can run in a browser without rewriting the whole stack. In practice, that means you are not rebuilding the app, you are turning on a platform the project already knows how to serve.
A typical Expo setup looks like this:
- Install the web support packages required by your Expo project.
- Start the development server with the web target enabled.
- Open the local browser preview and confirm the app boots cleanly.
- Fix any imports or components that still assume a device-only runtime.
That is often enough for a first pass. The part that matters is not the command itself, it is that Expo handles a large share of the platform wiring for you, which keeps the early setup from turning into a bundler exercise.
<a id="bare-react-native-projects"></a>
Bare React Native projects
Bare projects need more manual setup because you own the browser build chain. The usual path is to add react-native-web, create a web entry point, and configure your bundler so it can resolve web-specific files and browser-friendly modules. Separate entry files and a dedicated build script are common requirements, and that is where migrations often stall when imports still point to native-only APIs.
A bare setup usually needs these pieces:
- A browser entry file that boots the app in
index.html. - A web-aware bundler configuration so
.web.jsfiles resolve properly. - A build script that produces a browser bundle instead of a mobile bundle.
- A dev server you can open locally before you ever touch hosting.
Treat the browser as a first-class target, not a mobile bundle in disguise. That is where most deployment problems begin.
The immediate goal is simple. Get the app running in a local browser tab, then test every screen that assumes touch-only interactions, native navigation, or device APIs. Once that works, deployment stops being a guess and becomes a packaging step.
<a id="what-to-verify-before-you-move-on"></a>
What to verify before you move on
- Platform resolution: make sure imports resolve for web before production.
- Native dependencies: identify modules that do not exist in the browser.
- Routing entry points: confirm the web app has its own entry and fallback behavior.
- Asset paths: check that images, fonts, and static files load in the browser, not just in Metro.
<a id="adapting-your-codebase-for-the-browser"></a>
Adapting Your Codebase for the Browser
Running the app in a browser is the easy part. Work starts when you need it to behave like a web app instead of a mobile app viewed in a tab. Platform-specific imports, native-only APIs, and device assumptions are the usual places where the first build breaks, especially if they were written with iOS or Android in mind.
<a id="replace-device-assumptions-with-platform-aware-code"></a>
Replace device assumptions with platform-aware code
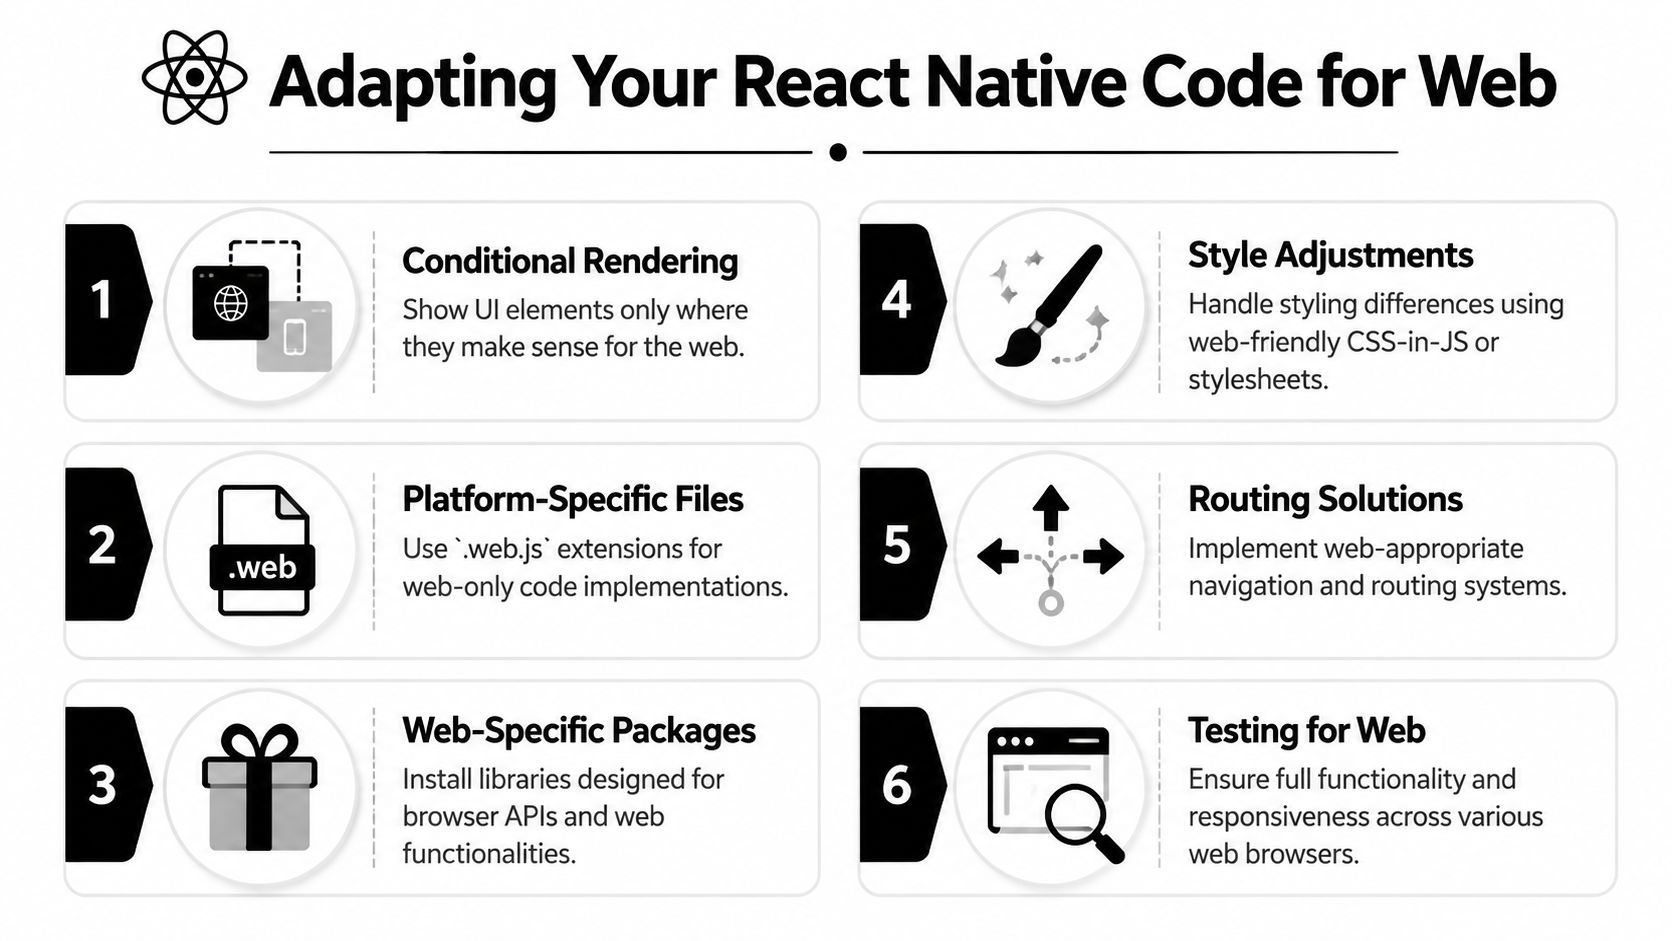
The cleanest way to handle browser differences is through platform-specific files and conditional rendering. If a component needs one implementation on web and another on mobile, use files like MyComponent.web.js and MyComponent.native.js instead of scattering inline branching through the component tree. That keeps browser logic isolated, makes testing easier, and reduces the chance that a mobile-only path slips into production web code.
Conditional rendering still has a place for small UI differences. A camera button, Bluetooth status indicator, or gesture-only control may belong on mobile and have no real equivalent in the browser. In those cases, render the element only where it makes sense and avoid building a fake version that behaves badly or confuses users.
Practical rule: if a feature depends on hardware, sensor access, or a device API, give the web a different path instead of a broken imitation.
Mock implementations help with services that are not core to the browser experience. If your app uses device storage, push notifications, or a native navigation helper, create a web-safe adapter that no-ops or switches to a browser-native alternative. The goal is a stable web build, not a perfect copy of every mobile feature.
<a id="rework-navigation-so-urls-matter"></a>
Rework navigation so URLs matter
Mobile navigation and browser routing solve related problems in different ways. A stack navigator feels natural in an app where the back button is built into the device. A browser expects URLs, deep links, and refreshable routes that still land on the right screen.
That means the routing layer has to respect the address bar. If someone opens /settings/profile directly, the browser should load the correct view instead of falling back to a broken shell. Client-side routing fallback matters during deployment too, because deep links need the host to return the app entry point instead of treating the path like a missing file.
<a id="choose-replacements-deliberately"></a>
Choose replacements deliberately
A browser migration goes better when replacement choices are made by category:
- Navigation libraries: pick one that works cleanly with browser URLs.
- Storage: use browser-safe persistence for web.
- Networking: prefer libraries that do not assume device-only transports.
- Analytics and tracking: verify the package works without native wrappers.
Native-only imports are the trap. A module that works fine on iOS or Android can fail immediately in a browser bundle if it touches code that does not exist on the web. The bundled app should be checked screen by screen, not launched once and declared ready.
The best migrations feel boring after the first pass. The app opens, the URL updates, the UI does not depend on a phone-specific assumption, and the browser does not have to guess what you meant.
<a id="handling-styles-and-assets-on-the-web"></a>
Handling Styles and Assets on the Web
React Native's styling model gives you a big head start, but the web adds expectations that mobile users never notice. Hover states matter. Wider layouts matter. Text wrapping behaves differently in a browser. If you keep the mobile UI untouched, the app often feels technically correct and visually out of place.
<a id="make-the-interface-responsive-on-purpose"></a>
Make the interface responsive on purpose
The fastest way to make a React Native app feel better on web is to stop thinking in fixed mobile widths. Hooks like useWindowDimensions let you adapt the layout to the current viewport, which is usually the simplest way to switch between compact and desktop-friendly views.
A pattern that works well:
const { width } = useWindowDimensions();
const isDesktop = width >= 1024;
From there, you can change column counts, padding, sidebar behavior, or card density based on the available space. That's better than trying to force one mobile layout to stretch across a wide browser window.
Responsive design doesn't need to be fancy to be effective. If the desktop version can show more information without overwhelming the user, use the screen space. If the mobile layout depends on vertical scrolling, keep that path intact and only expand the web variant where the extra width is beneficial.
<a id="add-hover-and-keyboard-affordances"></a>
Add hover and keyboard affordances
Touch-only interaction feels incomplete on the web. Buttons should react to hover, focus states should be visible, and clickable elements should be obvious to mouse users. If you're using Pressable or another touch-oriented abstraction, check whether it exposes web-friendly interaction states or whether you need a wrapper that adds CSS-like behavior.
Keyboard access is just as important. Web users expect tab navigation to work. Focus rings should be visible. If a control can be reached with a pointer but not a keyboard, the browser version isn't finished.
<a id="handle-assets-as-browser-assets"></a>
Handle assets as browser assets
Fonts, images, and icons often work differently once they leave the mobile pipeline. The browser has its own loading rules, caching behavior, and asset path constraints. A file that bundles perfectly into a mobile app can still fail to load if the hosting setup or build output doesn't expose it correctly.
Keep asset handling simple. If a file matters on first paint, verify it in the browser build early instead of waiting for production.
The visual quality bar is higher on the web because users compare your app to everything else in the browser, not just to other mobile apps. A good browser version doesn't just render the same UI, it respects the expectations of the platform it's living on.
<a id="building-and-deploying-to-a-hosting-provider"></a>
Building and Deploying to a Hosting Provider
Once the browser build passes local checks, deployment becomes a question of output and hosting. The usual pattern is straightforward, generate static files, then serve them from a host that supports client-side routing. In Expo-based workflows, that often means building a web bundle into a web-build/ directory and shipping those files to a static host, as shown in the Expo deployment pattern.
<a id="build-the-production-bundle"></a>
Build the production bundle
In Expo workflows, the common approach is to run browser development locally with npx expo start --web, then produce a deployable static build with npx expo build:web, which writes output to web-build/ as described in the Expo deployment pattern. In bare projects, the equivalent is whatever production build script your bundler exposes, usually writing to a dist or build folder.
The command matters less than the shape of the result. What you want is a directory of static assets that a host can serve without spinning up a Node process for every request.
<a id="pick-a-host-that-matches-your-workflow"></a>
Pick a host that matches your workflow
Vercel, Netlify, and Firebase Hosting are common choices because they handle static deployment cleanly and give you a path for custom domains and CI/CD. Each one works well once your app is compiled into browser assets, but the better choice depends on how your team ships updates and who will maintain the setup.
| Provider | Ease of Use | Free Tier Generosity | Key Feature |
|---|---|---|---|
| Vercel | Very easy for Git-based deploys | Good for small projects | Fast preview deployments and tight frontend workflow |
| Netlify | Very easy for static sites | Good for prototypes and side projects | Simple static hosting with clean build settings |
| Firebase Hosting | Straightforward once configured | Good for static delivery | Strong fit for apps already in the Google ecosystem |
For a React Native web app, the best host is usually the one your team will keep updated. If deployment is low-friction, fixes move faster and stale builds are less likely to sit in production.
<a id="configure-routing-fallback"></a>
Configure routing fallback
The most common production mistake is deploying the files successfully and then breaking deep links. Browser apps need routing fallback so the host serves the app shell when a user refreshes a client-side route. That pitfall is called out in the Expo deployment pattern, and it shows up often in real projects.
That matters for any screen reachable through a URL. If the host does not hand control back to the client router, direct visits to nested pages will fail even though the app works from the home page.
<a id="a-practical-deployment-flow"></a>
A practical deployment flow
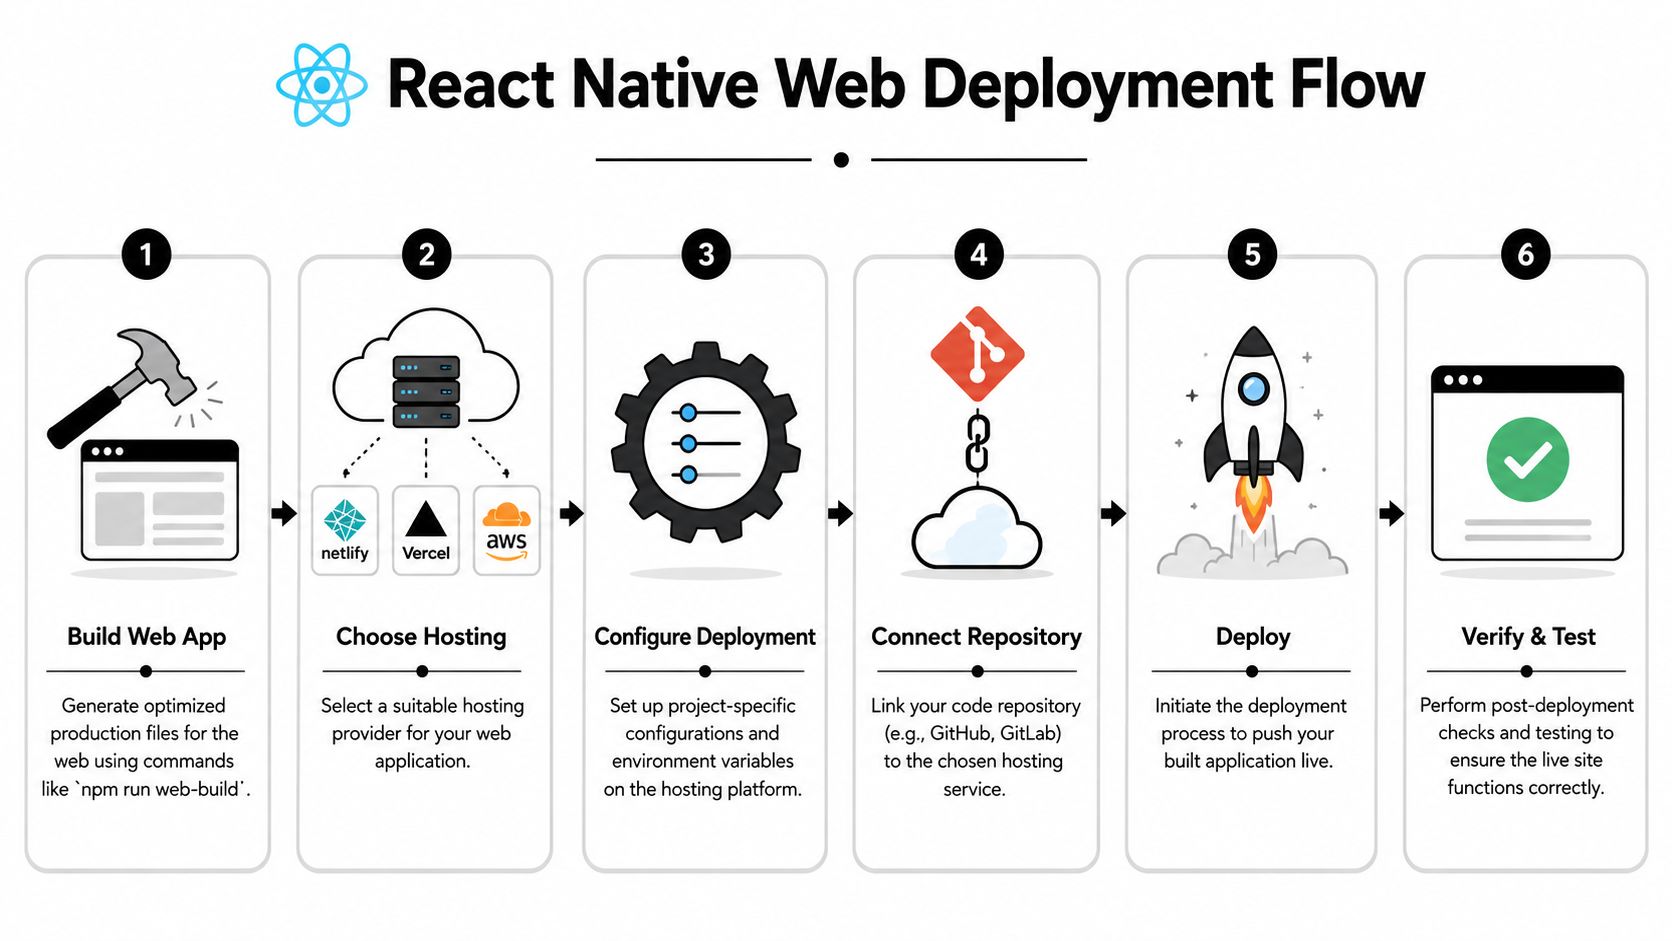
Use this sequence in practice:
- Build the web app into a static output folder.
- Choose hosting based on your team's workflow.
- Configure deployment settings and environment variables.
- Connect the repository so pushes can trigger builds.
- Deploy the generated files.
- Verify and test deep links, asset loading, and refresh behavior.
<a id="post-deployment-optimizations-and-pitfalls"></a>
Post-Deployment Optimizations and Pitfalls
A deployed app is not finished because it loads. The web version has to justify itself every day through speed, readability, and discoverability, and that means making a few product decisions that mobile-only teams often skip. React Native for web can be a strong fit, but only if you accept the trade-offs around bundle size, accessibility, and the level of browser polish your users expect.
<a id="tune-performance-before-users-feel-it"></a>
Tune performance before users feel it
Browser performance is easiest to improve when you treat the build output like a product, not a byproduct. Split large screens with lazy loading so users do not download every route on the first request. Compress images, ship modern formats where the browser supports them, and keep nonessential UI from blocking the first meaningful render.
Bundle size needs real attention in React Native Web because mobile assumptions can follow the app into the browser if nobody reviews the output. The browser does not care that the mobile version feels fast on a phone. It only sees the JavaScript, assets, and layout work you ask it to do, so every extra dependency and every heavy screen has a cost.
<a id="add-the-web-basics-that-mobile-apps-often-skip"></a>
Add the web basics that mobile apps often skip
Search visibility does not happen automatically. If the app has public pages, add titles, metadata, and semantic structure so crawlers can understand what each page is for. Tools like React Helmet are commonly used for this layer, especially when the browser app includes indexable landing pages or content routes, and Expo's hosting approach reflects the same push toward web-friendly deployment patterns as noted in the Expo hosting announcement.
Accessibility needs the same discipline. A web app with clean keyboard navigation, sensible headings, and screen-reader-friendly controls feels more professional and holds up better over time. Mobile-first code often misses these details if nobody makes them part of the release checklist, so test them the same way you test routing or asset loading.
<a id="decide-when-not-to-use-react-native-for-web"></a>
Decide when not to use React Native for web
Some products fit this stack well. Internal dashboards, lightweight companion tools, shared account portals, and content surfaces often gain more than they lose from a shared codebase. Other products run into browser compromises that never fully disappear, especially if the UI needs heavy desktop interaction patterns, advanced accessibility work, or a distinctly web-native design language.
Best fit: use the stack when shared code and quick multi-platform reach matter more than perfect browser specialization.
That is the right lens for the 2026 market. The question is less about whether React Native can deploy to web, and more about whether the browser version belongs in the same codebase at all. If the answer is yes, invest in the adaptation work early and treat web as a real product surface, not a checkbox.
If you want help turning a React Native or Expo app into something that ships cleanly across stores and web, LetsDeployIt handles the launch work end to end, from store submission assets to review-ready packaging. For teams that need a practical path from codebase to release, visit LetsDeployIt and see how they can take deployment and approval off your plate.