React Native App Store Review: Pass Apple and Google
A practical React Native app store review guide for Apple and Google Play: rejection causes, pre-submission checks and resubmission tactics.

Apple gives App Completeness its own rejection category in its rejection guidance. That reframes React Native app store review: the first problem is whether a reviewer can install your release, access its features, and finish the journeys your listing promises.
Treat submission as operational QA and documentation. A signed binary gets you into the process; working accounts, accurate disclosures, reproducible test states, and clear reviewer notes give the reviewer a build they can approve.
Table of Contents
- Common Rejection Reasons by Store
- Pre-Submission Build and Signing Checks
- Reviewer Access and Notes That Prevent Rejections
- Privacy and Data Disclosure Checklist
- Plan the Google Play Closed Test Before You Submit
- Reviewer Messages and Resubmission Tactics
<a id="common-rejection-reasons-by-store"></a>
Common Rejection Reasons by Store
| Store | Rejection trigger | Where React Native or Expo apps hit it | Fix before you submit |
|---|---|---|---|
| Apple | Guideline 2.1, App Completeness | Crashes on launch, placeholder screens, missing demo credentials | Test the release build on real devices and provide working reviewer access |
| Apple | Guideline 4.2, Minimum Functionality | A thin WebView wrapper around a website | Add substantive native features, useful offline behavior, or real in-app value |
| Apple | Privacy disclosures and permission explanations | Permission prompts without purpose strings, or no privacy policy | Write clear usage descriptions in Info.plist for applicable permissions and host a privacy policy |
| Apple | Account deletion requirements | Sign-up exists but no in-app account deletion | Add a deletion flow covering the account and associated data |
| Google Play | Data safety mismatch | Declared data doesn't match what SDKs or the backend collect | Inventory SDK and backend data flows before completing the form |
| Google Play | Permission declarations | Sensitive permissions left in the merged Android manifest | Remove unused permissions and justify those you keep |
| Google Play | Closed testing requirement | A qualifying new personal account hasn't completed the required continuous tester window | Recruit testers before setting the launch date |
Completeness matters more than framework choice. A release can compile successfully while failing immediately because its JavaScript bundle expects an environment variable that wasn't present during the production build. It can also launch cleanly but leave the reviewer staring at an empty marketplace, an expired invitation, or a login screen with no usable credentials.
In an Expo managed project, inspect configuration plugins, build profiles, and generated native settings. In a bare React Native project, inspect the native targets as well as the JavaScript application. Neither workflow removes the need to test the installed artifact.
<a id="functionality-must-be-useful-not-decorative"></a>
Functionality must be useful, not decorative
A WebView isn't automatically the problem. The problem is an app whose entire value remains a website behind a native launcher.
Adding a camera button solely to make the app appear native isn't a convincing fix. Build capabilities that belong in the product: saved content that works without connectivity, meaningful device integration, or a complete mobile workflow that doesn't collapse into browser navigation. Explain that value in the listing and make it easy to find.
Privacy-related failures need a different response. Camera and location requests need understandable usage descriptions where the platform requires them; notification authorization uses its own system flow, not a generic Info.plist purpose-string fix. Explain the benefit before requesting access, and ensure denial doesn't strand the user.
<a id="use-the-table-as-a-release-gate"></a>
Use the table as a release gate
Assign each relevant row to someone who can verify it, not merely someone who can edit the code. For account deletion, that means checking backend behavior. For permissions, it means inspecting generated native configuration rather than trusting the JavaScript import list.
Submission rule: A checkbox is complete only when someone has verified the fix in the release artifact and recorded what they tested.
Select the rows matching your app's features, attach evidence, and resolve failures before uploading. Rebuilding without changing the failing behavior only creates another submission with the same problem.
<a id="pre-submission-build-and-signing-checks"></a>
Pre-Submission Build and Signing Checks
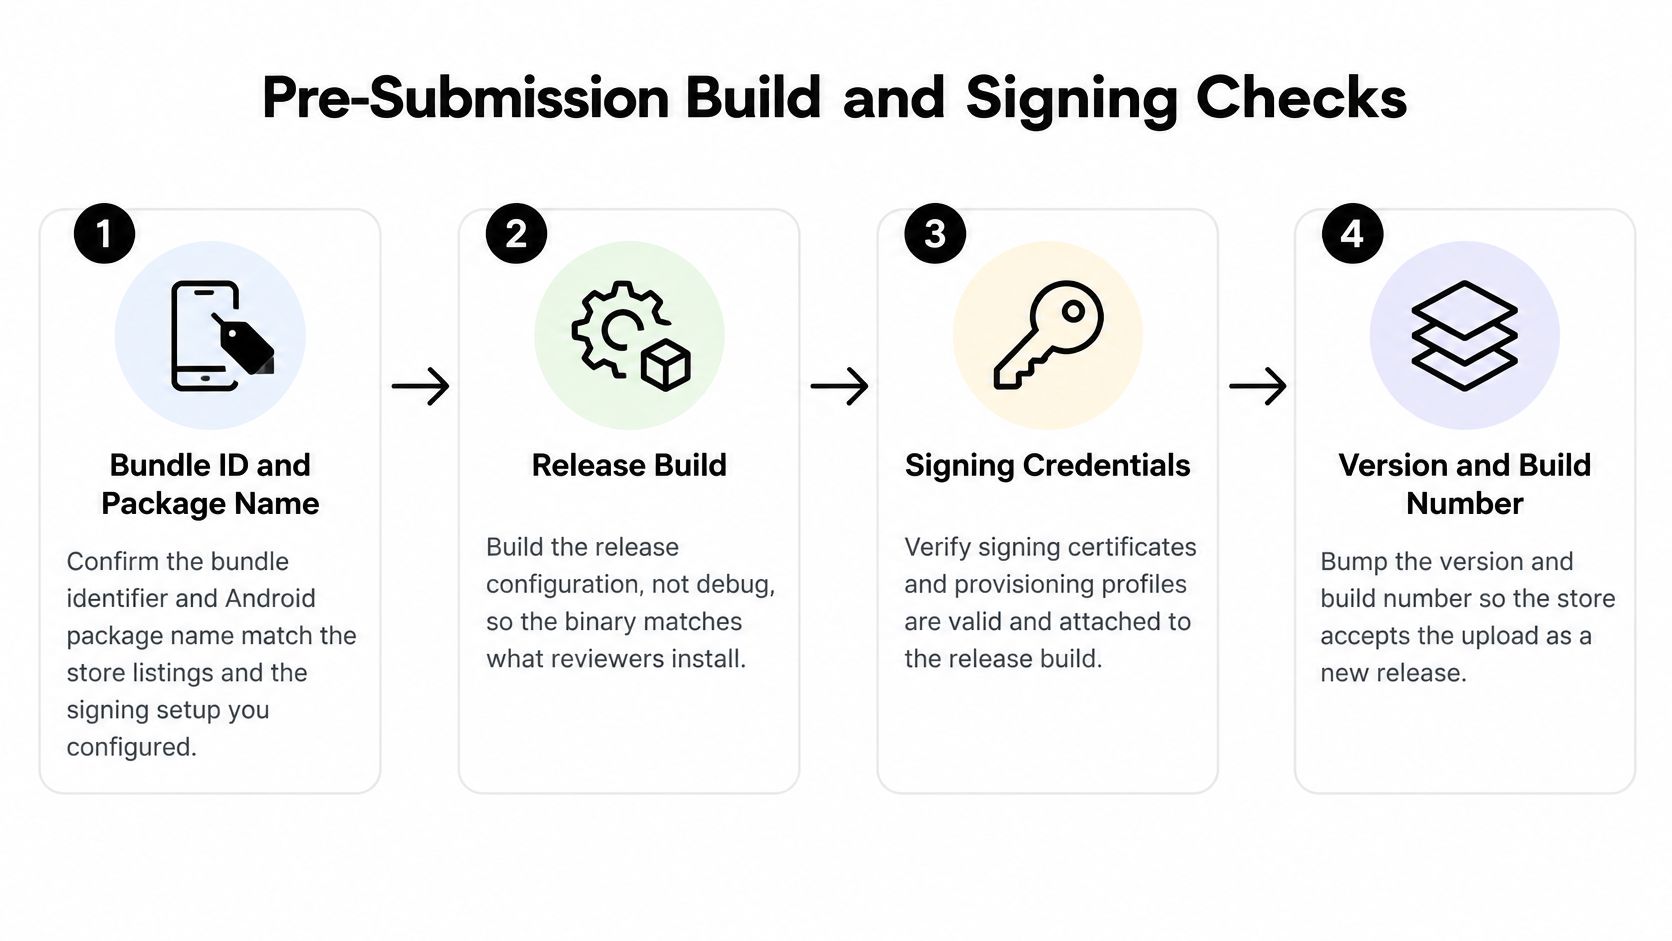
Build identity, runtime configuration, and signing are separate checks. A valid certificate won't rescue the wrong API environment, and a successful local launch doesn't prove that the store artifact contains the same configuration.
<a id="verify-the-artifact-in-order"></a>
Verify the artifact in order
-
Match the application identity. Confirm the iOS bundle identifier and Android application ID match their store records and signing configuration. Check resolved build settings, especially if development and production use different suffixes.
-
Build the production release configuration. Inspect the selected EAS profile, environment variables, API endpoint, and update channel if you use one. Remove development-only menus and ensure startup doesn't rely on Metro or a developer machine.
-
Verify signing credentials. For EAS-generated iOS builds, confirm the distribution credentials and provisioning profile belong to the intended app and team. On Android, distinguish the upload key from the app-signing key managed through Play App Signing, and check certificate-dependent integrations against the installed distribution build.
-
Inspect the merged Android manifest. Use Android Studio's merged manifest view or inspect the built artifact to see permissions contributed by dependencies. Remove unnecessary declarations through native configuration or the relevant Expo config plugin, then rebuild.
-
Read the generated iOS usage descriptions. Check the final Info.plist, not just app configuration, because plugins and native dependencies can change it. Replace generic explanations with the actual feature benefit, and don't add permission keys for capabilities the app doesn't use.
-
Install through the distribution path. Test the candidate through TestFlight and a Play testing track on a physical iPhone and a mid-range Android device. Start from a fresh install, then exercise authentication, the main transaction, background recovery, and permission denial.
-
Check version identifiers. Increment the platform build identifiers appropriately and confirm the intended marketing version. Record the source commit and build artifact so a rejection can be traced to the exact release.
<a id="define-a-clear-pass-condition"></a>
Define a clear pass condition
A common configuration trap is validating a TestFlight candidate, then generating a different store candidate that points to staging. Compare the actual artifacts and their resolved configuration rather than assuming identical source code means identical behavior.
Keep a small release record containing the build identifier, backend environment, signing identity, and test result. That record makes it possible to distinguish a code regression from a configuration mistake without guessing.
The pass condition is concrete: the candidate launches cold, completes the main flow, and contains no placeholder text, dead buttons, or developer-only dependencies. Don't submit an artifact that nobody has installed.
<a id="reviewer-access-and-notes-that-prevent-rejections"></a>
Reviewer Access and Notes That Prevent Rejections
Say a marketplace reviewer signs in successfully but can't open seller payouts. The account has no completed sales, so the screen never becomes available. Your authentication works; your review setup doesn't.
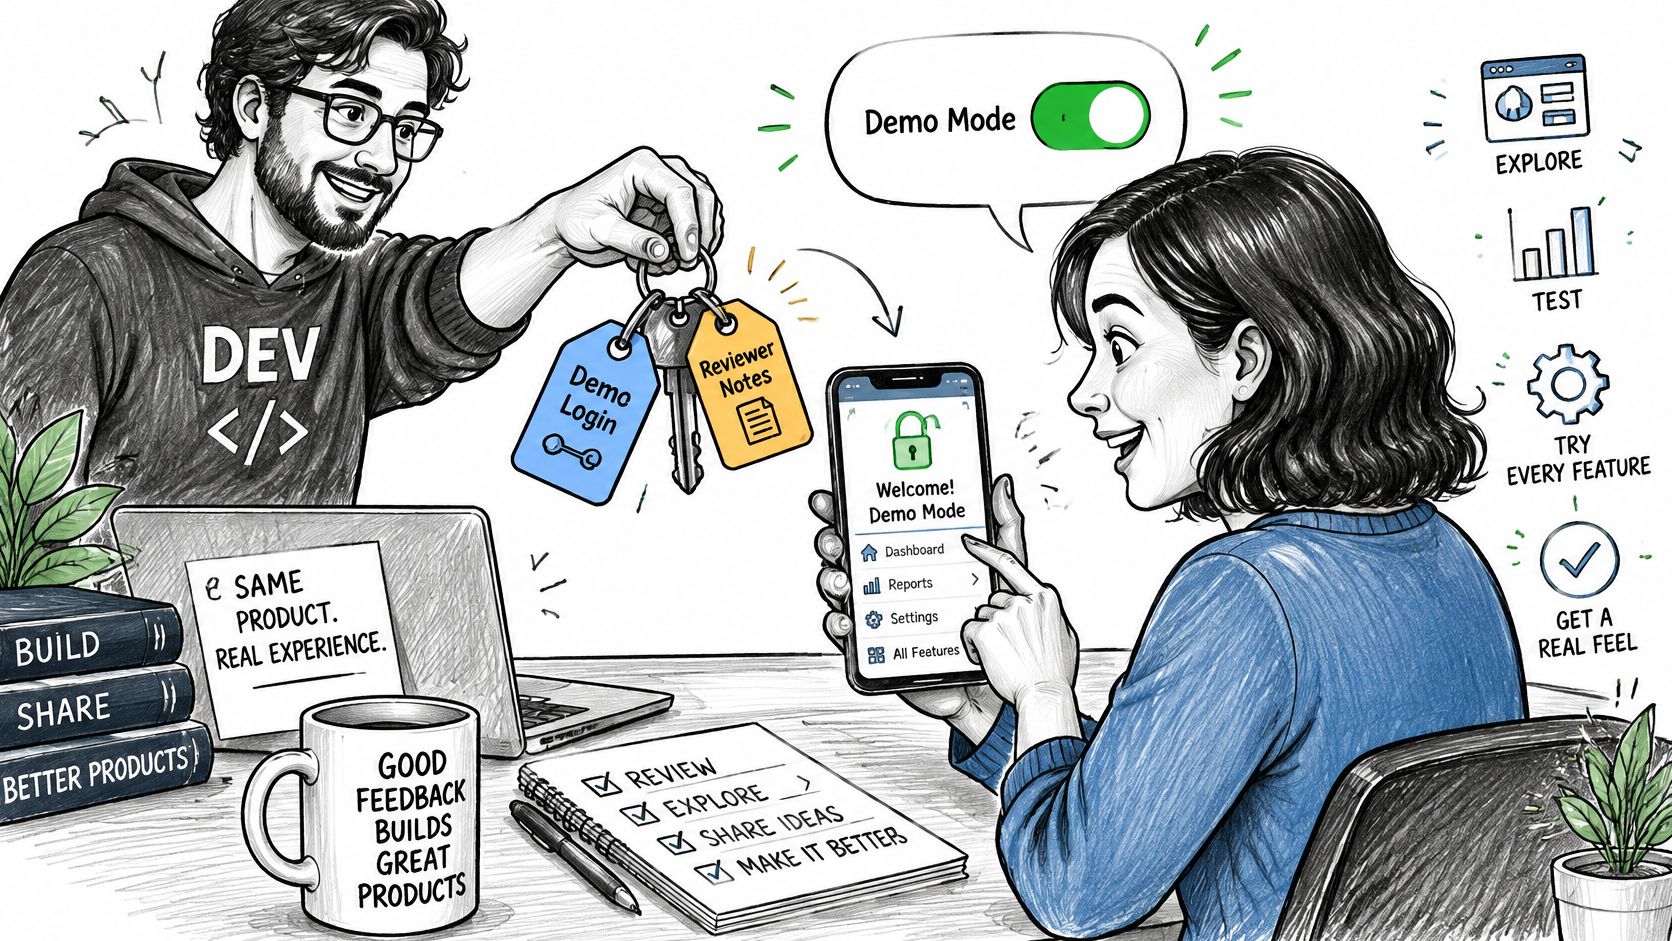
The App Store Review Guidelines require full reviewer access, including demo credentials or a fully featured demo mode for account-based functionality. Build that access around known account states, not a username and a hopeful instruction to explore.
<a id="give-every-gated-feature-a-reproducible-state"></a>
Give every gated feature a reproducible state
| Gated feature | Test account or device | Required state | Reset path |
|---|---|---|---|
| Seller payouts screen | Seller-demo test account | Seeded seller with a completed listing | Reseed script restores the state |
| Checkout and paywall | Sandbox buyer account | Sandbox card for marketplace checkout and no active sandbox subscription | Reset payment fixtures; cancel sandbox subscription in store settings |
| Push notifications | Physical device prompt | Permission not yet granted | Change authorization in device settings; use a fresh test setup to verify the initial prompt |
| Location-based search | Physical device prompt | Location permission not yet granted | Reset location authorization in device settings |
Separate marketplace payment testing from store subscription testing. A sandbox card belongs to the payment provider's supported test environment; digital subscription purchases need the platform's sandbox purchase flow. Don't tell reviewers to use a test card in a live checkout.
Keep production infrastructure available during review. If a documented demo tenant uses isolated test data, ensure it exposes the same functionality rather than concealing features or changing the app's purpose. Avoid a staging service that sleeps, requires a VPN, or depends on someone manually approving access.
<a id="write-notes-that-remove-ambiguity"></a>
Write notes that remove ambiguity
Use a compact checklist:
- App purpose: Explain the product and its main journey in plain language.
- Access paths: Provide credentials, navigation steps, required account roles, and recovery instructions.
- Permissions: Identify the action that triggers location or notifications and explain why it needs access.
- External dependencies: Describe hardware, service availability, or regional constraints, with a faithful demonstration path where possible.
For device-specific functionality, provide precise setup instructions and supporting demonstration material without implying that a video replaces a working feature. Seed deterministic content so retries don't encounter an empty or exhausted account.
Use the App Store Connect submission walkthrough when transferring those instructions into the submission. Write the final notes only after someone unfamiliar with the app has tested the access matrix without coaching.
<a id="privacy-and-data-disclosure-checklist"></a>
Privacy and Data Disclosure Checklist
The dangerous mismatch is declaring only data your team explicitly collects while ignoring what dependencies transmit. Authentication, analytics, crash reporting, and push libraries can all introduce flows that aren't obvious from the screens.
Treat store forms as separate descriptions of the same application, not interchangeable questionnaires. Apple asks about data categories, purposes, linkage, and tracking; Google's Data safety form asks about collection and sharing using its own definitions.
| Data collected | Apple privacy label | Google Play Data safety | Typical React Native source |
|---|---|---|---|
| Email and name from sign-up | Contact info; assess linkage to user | Personal info, name and email | Auth SDK or backend profile |
| Device identifiers for analytics | Identifiers; assess tracking separately | Device or other IDs | Analytics SDK |
| Precise location | Location | Location | expo-location or a location library |
| Crash and performance data | Diagnostics | App info and performance | Crash reporting SDK |
| Purchase history | Purchases | Financial info, purchase history | In-app purchase SDK |
| Push notification token | Assess under identifiers based on implementation | Assess under device or other IDs | expo-notifications or push SDK |
<a id="map-behavior-before-selecting-categories"></a>
Map behavior before selecting categories
Start with identity. Trace where sign-up details go, which services retain them, and whether logs also capture them. Then inspect analytics identifiers: an identifier isn't automatically tracking, and linking data to an account isn't the same question as tracking across other companies' apps or websites.
For location, distinguish requesting permission from transmitting coordinates. For diagnostics, inspect breadcrumbs and custom attributes, which may contain more than stack traces. Purchase records and push tokens also need implementation-level review rather than category selection by library name.
Build the inventory from:
- JavaScript dependencies: Inspect package.json, the lockfile, and enabled SDK features.
- Native dependencies: Check CocoaPods and Android dependencies for transitive SDKs.
- Backend storage: List profile fields, event payloads, logs, payment records, and deletion behavior.
- Actual traffic: Compare SDK documentation with requests from a release build.
<a id="keep-policy-text-and-implementation-aligned"></a>
Keep policy text and implementation aligned
If an external automation service sits inside those flows, review its privacy terms for automation integrations alongside your own inventory, then disclose only what your app transmits through that connection.
Use the app store privacy policy guide to organize the written policy around the inventory. Don't copy another app's policy or paste Apple answers into Google's form.
Test account deletion on the live candidate with a disposable account. Verify downstream processing and explain any justified retention rather than presenting a logout action as deletion.
Disclosures must match the submitted build. Recheck them after SDK upgrades, configuration changes, or new backend integrations, even when the visible interface hasn't changed.
<a id="plan-the-google-play-closed-test-before-you-submit"></a>
Plan the Google Play Closed Test Before You Submit
For personal Play Console accounts created after November 13, 2023, Google requires at least 12 testers to remain opted in for 14 continuous days before you can apply for production access. That makes closed testing a schedule dependency. Start recruiting while preparing the Android App Bundle, not after the store listing is finished. Google's personal-account testing requirements explain which accounts are covered.
| Phase | What you do | Time needed |
|---|---|---|
| Release preparation | Create the closed-test release, upload the Android App Bundle, and verify track installation | One working session, plus console processing |
| Continuous test window | Keep the qualifying tester cohort opted in and run meaningful test journeys | 14 continuous days |
| Production-access application | Submit testing information and answer readiness questions | Allow time for Google's assessment and any follow-up |
| Production release review | Submit the production release once access is available | Allow time for Google's review |
<a id="start-the-clock-from-confirmed-participation"></a>
Start the clock from confirmed participation
An invitation is not an opt-in. Confirm that testers use the intended Google account, can open the enrollment page, and can install the app from the closed track. An APK shared through chat does not verify that Play distribution works.
Google's closed-testing guidance requires uninterrupted participation. Recruit beyond the minimum, check the roster regularly, and account for opt-outs before they put the qualifying cohort below the requirement.
Keep a daily operating log with tester status, device model, Android version, assigned journey, and reported defects. Collect only the personal information needed to coordinate testing.
Use realistic app tasks:
- Enrollment and installation: Check enrollment, installation, updates, and cold startup.
- Account journeys: Exercise sign-up, password recovery, deletion, and role-specific screens.
- Device behavior: Test permission denial, backgrounding, weak connectivity, and manufacturer-specific behavior.
- Navigation and purchases: Verify deep links, purchase restoration, subscription state, and backend reconciliation.
- Release readiness: Triage unresolved defects and complete Data safety from the app's actual data inventory.
Ratings do not replace test evidence. Ask participants what they tried, what failed, and whether a fix resolved the issue. Do not ask them to manufacture positive engagement.
<a id="separate-eligibility-from-publication"></a>
Separate eligibility from publication
After the testing window, apply for production access with an accurate account of participation and fixes. Production access and production release approval are separate steps. Finishing the test does not make the app public.
Google's review-planning guidance says reviews can take 7 days or longer and warns that store-detail changes after submission may restart review. Avoid unnecessary listing edits while the release is under assessment.
For regional console setup, see NZ Apps' Play Console walkthrough for ANZ founders. The Google Play 12-tester requirement guide covers how to coordinate the eligibility period.
LetsDeployIt's Android closed-testing add-on supplies and manages 12 testers for 14 days for personal Play accounts. To start, share your app's link and how to reach you. The team tries the app and replies within two business days with how it would get the app into the stores.
Calendar decision: Confirm the qualifying cohort, schedule the uninterrupted 14-day test, then allow time for production-access assessment and release review.
For example, if the cohort is confirmed on a Monday, the required test period ends around the corresponding Monday a fortnight later, assuming participation remains continuous. Plan publication after that date, with additional time for assessment and review. Set campaign dates only when they can accommodate that uncertainty.
<a id="reviewer-messages-and-resubmission-tactics"></a>
Reviewer Messages and Resubmission Tactics
A reply arguing that the app deserves approval because competitors have similar features gives the reviewer little to verify. A useful reply identifies the objection, describes the change, and directs the reviewer to the corrected behavior.
Write a change record, not a negotiation. Keep the tone factual, and distinguish an actual fix from clarification of a feature the reviewer couldn't reach.
<a id="use-replies-that-can-be-verified"></a>
Use replies that can be verified
Adapt these templates to the actual change. Replace every placeholder before sending.
Thank you for identifying the launch crash under App Completeness. We fixed the startup failure caused by an empty authentication response and verified a fresh installation. The replacement build [build identifier] contains the fix; please review that build using the supplied demo account.
Thank you for the Minimum Functionality feedback. We added [specific native workflow] and [specific offline behavior], accessible through [navigation path]. Build [build identifier] includes these changes, and the attached screenshots show the relevant screens; please review the updated functionality.
Thank you for the Data safety question. We corrected the declaration to reflect that [SDK name] collects [specific data] for [specific purpose], and verified whether it shares that data under the applicable definitions. The updated declaration corresponds to build [build identifier]; please review the corrected submission.
Don't list aspirational features in the functionality reply. Don't say an SDK collects nothing until you've checked its enabled configuration and transmitted payloads. Attach screenshots when they establish a navigation path or changed state, not as a replacement for access.
<a id="fix-the-whole-rejection-before-resubmitting"></a>
Fix the whole rejection before resubmitting
Turn every reviewer objection into a tracked item with an owner, change, and verification result. Address the full set together so the reviewer doesn't reopen the same blocked journey after finding that only the first symptom changed.
Keep unrelated metadata edits out of the resubmission. Change descriptions or disclosures when the fix requires them, but don't combine a compliance correction with optional listing experiments.
Our Launch single-store plan includes the app icon, splash screen, store screenshots in all sizes, privacy labels and Data Safety, a compliance pass, certificates and signing, and fix and resubmit free until approved. That covers preparation and follow-through, not control over the review queue.
Apple and Google control platform review times, which are outside LetsDeployIt's control. Plan for follow-up questions, keep backend services and demo accounts available, and never promise a publication date just because the corrected upload succeeded.
Bring your working React Native or Expo app to LetsDeployIt for help with native builds, signing, store assets, compliance, reviewer notes, and submission. Share the app link and your contact details so our team can assess the release and explain the path to getting it into the stores.